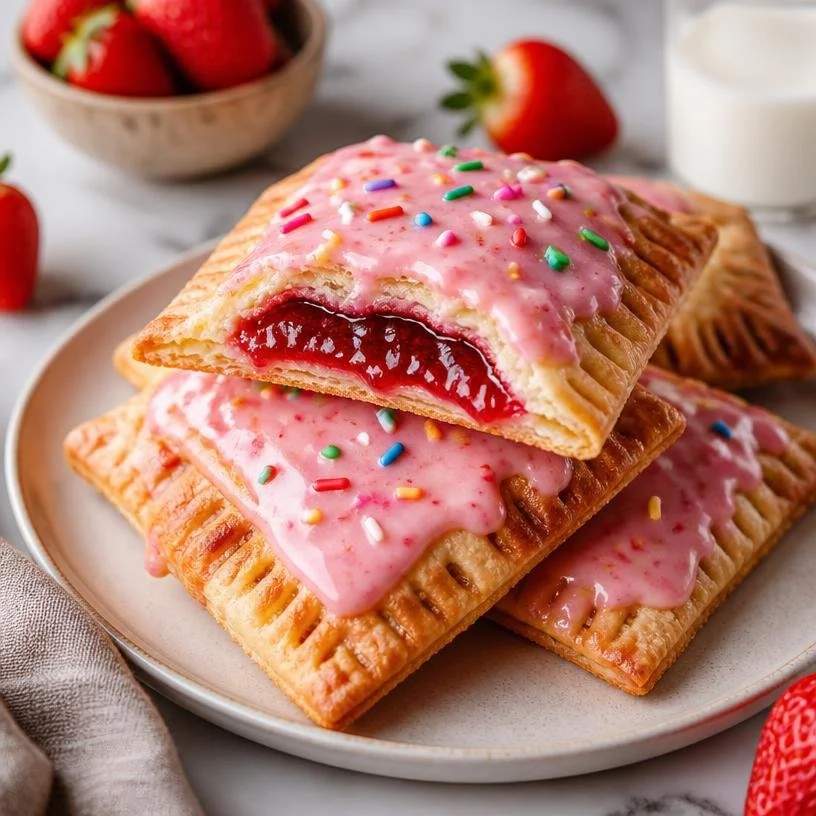
The Joy of Homemade Strawberry Pop-Tarts
Hi there, food lovers! Today, we’re diving deep into a delightful treat that’s sure to spark joy in your kitchen: homemade strawberry pop-tarts! Each flaky, delicious bite will transport you back to carefree mornings, filled with bright sunshine and the sweet smells of breakfast. What’s even more exciting? You don’t need to be a baking wizard to whip up this nostalgic delight.
Imagine biting into a golden pastry crust filled with luscious strawberry jam, topped with a sweet glaze, and sprinkled with colorful fun! Sounds dreamy, right? Making your own pop-tarts not only lets you personalize the flavor but also makes for a perfect family activity. Plus, who doesn’t love the satisfaction that comes from creating something sweet and nostalgic from scratch?
In a world where everything is fast-paced, taking the time to bake some homemade goodies is such a joyful experience. Not just for the taste but for the memories we create in the kitchen together. Gather your loved ones, put on some fun music, and let’s set the stage for a delightful baking adventure!
So, roll up your sleeves, grab your favorite mixing bowls, and let’s make some homemade strawberry pop-tarts that you’ll be proud to share (or keep all for yourself, no judgment here!) Are you ready? Let’s jump in!
A Trip Down Memory Lane
Let me take you back to my childhood, where Saturday mornings were reserved for a special tradition: baking day with my grandma. The whole house would fill up with the warmth of the oven and the delicious scents of sweet treats. I remember walking into the kitchen, greeted by the sight of flour dust swirling in the air and the cheerful sound of my grandma humming her favorite tunes.
One of our favorite recipes was for homemade pop-tarts, and I loved every moment of it! We’d throw on our aprons (which were always two sizes too big for me), crack some jokes, and get to work. The laughter echoed as we stuffed the dough with whatever jam we had—though strawberry was always our go-to! After meticulously sealing the edges, we would cut little slits in the tops, watching as they puffed up and transformed into these golden, flaky squares.
Those pop-tarts were more than just breakfast; they were a meal made with love, patience, and a sprinkle of fun. Now, I want to bring that same joy and nostalgia back into your kitchen! This recipe is not just about the pop-tarts; it’s about the memories you’ll create along the way!
Ingredients
To make these delicious homemade strawberry pop-tarts, you’ll need the following ingredients:
-
2 cups all-purpose flour
This is the base of our pastry. If you’re looking for a gluten-free option, you can use a 1:1 gluten-free flour blend! -
1/4 teaspoon salt
Salt enhances flavor and balances the sweetness. A pinch goes a long way! -
1 tablespoon sugar
Adds a hint of sweetness to the crust. You can adjust this to taste or use coconut sugar for a healthier alternative. -
1/2 cup unsalted butter, chilled and cubed
Cold butter creates a flaky texture. If you’re vegan, try using coconut oil or a plant-based butter substitute. -
6-8 tablespoons cold water
Ice-cold water helps bring the dough together without melting the butter. It’s the secret to flaky layers! -
1/2 cup strawberry jam
Use your favorite brand or homemade jam! You can also play around with different flavors like raspberry or mixed berries. -
1 cup powdered sugar
This will create our sweet glaze. For a lighter option, you can substitute with powdered erythritol for a sugar-free version. -
1-2 tablespoons milk
This helps thin the glaze for easy drizzling. Any milk works—dairy or plant-based! -
Sprinkles (optional)
Always a fun addition! Who doesn’t love a pop of color? Use your favorite sprinkles to make it festive!
Step-by-Step Instructions
Let’s get into it! Making homemade strawberry pop-tarts is truly a breeze with these simple steps. Follow along closely, and I’ll share some tips and tricks along the way.
1. Shape the Dough
In a large mixing bowl, combine 2 cups of all-purpose flour, 1/4 teaspoon salt, and 1 tablespoon sugar. Use a whisk to mix them evenly. Now, here comes the fun part—adding the butter!
Cut 1/2 cup of chilled unsalted butter into the flour mixture using a pastry cutter or your fingers until it resembles coarse crumbs. It’s totally okay if a few small pieces remain; they’ll create those lovely flaky layers!
2. Bring It Together
Next, drizzle in 6-8 tablespoons of cold water, one tablespoon at a time. Mix with a fork until the dough comes together. If it feels too dry, add a little more water—just be careful not to overwork the dough! We want it tender, not tough.
Once combined, form it into a disk shape, wrap it in plastic wrap, and pop it in the fridge for at least 30 minutes. This helps the butter firm up again—and trust me, this step is crucial for ultimate flakiness!
3. Roll it Out
Once chilled, dust your countertop with flour and roll out the dough to about 1/8-inch thickness. Use a sharp knife or pizza cutter to cut out rectangles (about 3×4 inches). Aim for about 12 rectangles total—this will give you enough for six full pop-tarts.
4. Fill ‘Em Up
Now, for the fun part! On half of the rectangles, spoon about 1 tablespoon of strawberry jam in the center. Be sure to leave a bit of space around the edges for sealing! You can add more jam if you want, but keep in mind that it can ooze out while baking.
5. Seal the Deal
Take the other half of your rectangles and carefully place them on top of the jam-filled pieces. Gently press down the edges to seal them tightly. A fork works wonders to crimp the edges and create a decorative touch. Plus, it ensures your jam stays inside during baking!
6. Create Vents
Now it’s time to let the steam escape! Use a sharp knife to make a few small slits on the top of each pop-tart. This will prevent any exploding pastries in the oven—always a plus!
7. Bake ‘Em Up
Preheat your oven to 375°F (190°C), and line a baking sheet with parchment paper. Place your pop-tarts on the prepared sheet and bake for about 20-25 minutes, until golden brown. Keep an eye on them—oven times can vary!
8. Make the Glaze
While the pop-tarts cool, whisk together 1 cup of powdered sugar and 1-2 tablespoons of milk in a bowl until smooth. You’ll want that lovely glaze to drizzle or spread over your pop-tarts once they cool.
9. Make ‘Em Sparkle
Once your pop-tarts are completely cool, drizzle the glaze over the top and, if you’re feeling festive, sprinkle some colorful sprinkles! It adds that extra pop of fun.
Serving Suggestions
To serve these adorable pop-tarts, you can simply place them on a cute platter alongside a cup of coffee or a glass of cold milk. If you have friends or family over, they make an excellent addition to brunch or a cozy evening snack. Pair with fresh strawberry slices or a dollop of whipped cream for that extra touch of sweetness!
Recipe Variations
Get creative! Here are a few fun twists on the classic strawberry pop-tarts:
-
Mixed Berry Bliss: Swap out the strawberry jam for a combination of raspberry, blueberry, and blackberry for a mixed berry medley!
-
PB&J Pop-Tarts: Spread peanut butter on one side and jam on the other before sealing. You’ll have a nostalgic twist!
-
Chocolate Hazelnut Dream: Fill with chocolate hazelnut spread and top with crushed hazelnuts for a scrumptious treat.
-
Savory Option: Try using cheesy fillings like cream cheese with herbs for a savory twist that can be enjoyed at breakfast or as a snack.
-
Gluten-Free Goodness: Use a gluten-free flour blend to create gluten-free pop-tarts anyone can enjoy!
Chef’s Notes
A little confession from my time in the kitchen: I’ve had my fair share of pop-tart failures! There was one memorable occasion when I forgot to seal the edges, and jam erupted all over my oven. Let’s just say, it was a sticky cleanup! But instead of getting discouraged, I learned a valuable lesson about sealing those edges tightly.
Over time, I’ve tweaked this recipe a bit. Initially, I used only butter—but after experimenting, I found that combining some olive oil gives the crust an interesting flavor and keeps it lush and tender. The beauty of cooking is that it’s constantly evolving, just like our taste preferences!
FAQs and Troubleshooting
1. What if my dough is too crumbly?
No worries! If your dough feels too dry or crumbly, just add a tablespoon of cold water at a time until it comes together. You want it to hold together without feeling sticky.
2. Can I use fresh strawberries instead of jam?
Absolutely! If you prefer fresh strawberries, chop them up and mix with a bit of sugar to create a filling. Just be careful about the moisture level, as the jam is concentrated and won’t make your pop-tarts soggy.
3. How do I know when my pop-tarts are done?
Keep an eye on the color! Your pop-tarts should be golden brown when ready to pull from the oven. If they’re too pale, give them a few more minutes.
4. Can I freeze my pop-tarts?
Yes! Assemble and freeze before baking. When you’re ready to enjoy, just pop them straight into the oven from the freezer—add a few extra minutes to the baking time, and you’ll have freshly baked pop-tarts anytime!
Conclusion
Now that you have this delightful homemade strawberry pop-tart recipe at your fingertips, it’s time to gather your kitchen crew and get baking! Feel the joy as you create those lovely, flaky pastries filled with sweet strawberry goodness.
With every bite, you’re not just enjoying a delicious treat; you’re forging new memories and passing on the gift of cooking to the next generation. So go ahead, celebrate life’s sweet moments with these pop-tarts. Your kitchen is about to become a joyful, sprinkle-filled haven! Happy baking, my friends!
PrintHomemade Strawberry Pop-Tarts

Delightful homemade strawberry pop-tarts with a flaky crust, filled with luscious strawberry jam and topped with a sweet glaze.
- Prep Time: 30 minutes
- Cook Time: 25 minutes
- Total Time: 55 minutes
- Yield: 6 servings 1x
- Category: Dessert
- Method: Baking
- Cuisine: American
- Diet: Vegetarian
Ingredients
- 2 cups all-purpose flour
- 1/4 teaspoon salt
- 1 tablespoon sugar
- 1/2 cup unsalted butter, chilled and cubed
- 6–8 tablespoons cold water
- 1/2 cup strawberry jam
- 1 cup powdered sugar
- 1–2 tablespoons milk
- Sprinkles (optional)
Instructions
- Combine the flour, salt, and sugar in a large mixing bowl.
- Cut the cold butter into the flour mixture until it resembles coarse crumbs.
- Drizzle in cold water, one tablespoon at a time, until the dough comes together.
- Wrap the dough in plastic wrap and chill for at least 30 minutes.
- Roll out the dough to about 1/8-inch thickness and cut out rectangles.
- Spoon about 1 tablespoon of strawberry jam onto half of the rectangles.
- Seal the other half of the rectangles on top and crimp the edges.
- Make small slits on the top of each pop-tart for venting.
- Bake in a preheated oven at 375°F (190°C) for 20-25 minutes until golden brown.
- Whisk together powdered sugar and milk for the glaze.
- Drizzle the glaze over cooled pop-tarts and sprinkle with fun toppings.
Notes
Feel free to customize with different fruit jams or fillings.
Nutrition
- Serving Size: 1 pop-tart
- Calories: 280
- Sugar: 15g
- Sodium: 200mg
- Fat: 10g
- Saturated Fat: 6g
- Unsaturated Fat: 4g
- Trans Fat: 0g
- Carbohydrates: 40g
- Fiber: 1g
- Protein: 3g
- Cholesterol: 30mg
Keywords: strawberry pop-tarts, homemade desserts, baking, nostalgic treats, breakfast