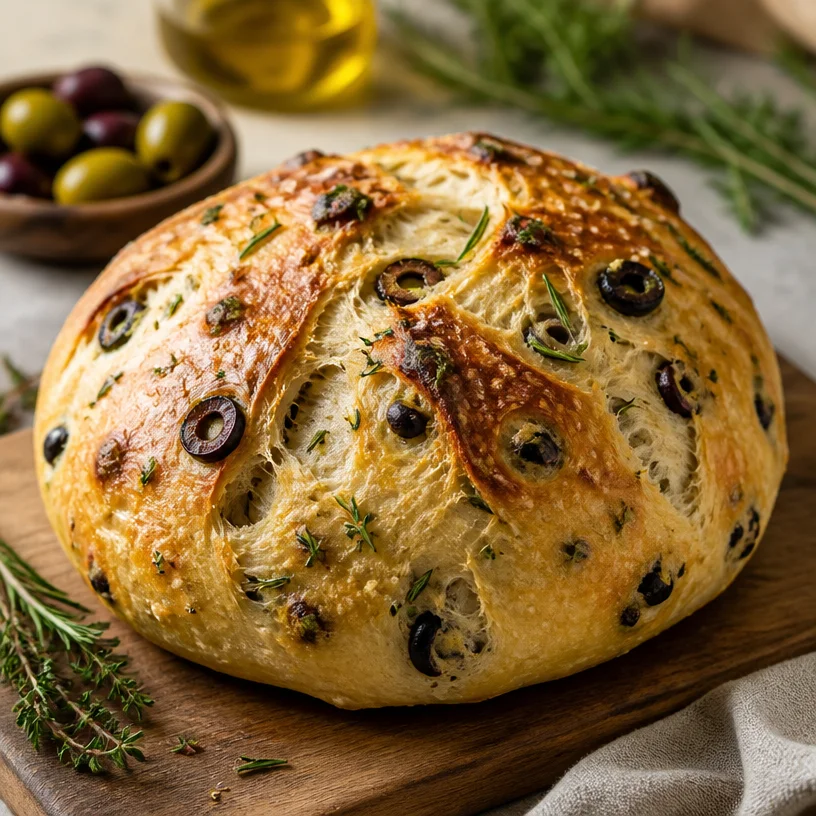
Olive Herb Bread: A Slice of Nostalgia and Flavor
Hello, food lovers! Today, we’re diving into a recipe that’s near and dear to my heart—Olive Herb Bread. Picture this: the scent of warm, freshly baked bread wafting through your kitchen, the sound of laughter, and the joy of sharing good food with loved ones. When I think of Olive Herb Bread, I’m transported back to sun-soaked afternoons spent in my grandmother’s kitchen, where every loaf had a story, and every bite was a hug from home.
A Nostalgic Slice of Life
Growing up, my grandmother had a way of making her kitchen feel like magic. Every Sunday, she’d gather the family for what she called “Bread Day.” It wasn’t just about the warm loaves that came out of the oven; it was about the conversations, the stories shared, and the bonds strengthened over a slice of freshly baked bread. One of her specialties was Olive Herb Bread, a delightful fusion of savory olives and aromatic herbs that always made an appearance.
I remember standing on a stool, peering over the countertop as she expertly kneaded the dough, her hands a blur of motion. She taught me how to fold in the herbs, the olives, and the love. Each loaf was different, a reflection of her mood, the season, or sometimes even the random bits of leftovers she had in the fridge. The best part? We savored it with a drizzle of olive oil and a sprinkle of sea salt, all while sharing stories and, of course, those priceless kitchen secrets.
Today, I’m excited to share this cherished recipe with you, hoping that it inspires your own kitchen adventures and brings a little bit of my grandmother’s magic into your home.
Ingredients
Here’s what you’ll need to conjure up this delightful Olive Herb Bread:
-
2 cups bread flour: Bread flour has a higher protein content than all-purpose flour, giving your bread that lovely chewy texture. If you’re out, all-purpose flour can work in a pinch; just know the texture might be a tad softer.
-
1 cup pitted olives: Use your favorite olives—green, black, or even a mix! They add a briny depth that elevates the whole loaf. If you don’t have olives on hand, chopped sun-dried tomatoes or roasted peppers can offer a great alternative.
-
1 tablespoon fresh rosemary: This aromatic herb brings a fragrant warmth to the bread. If you don’t have fresh rosemary, dried rosemary will work, but use about half the amount as it’s more potent.
-
1 tablespoon fresh thyme: Similar to rosemary, thyme adds another layer of flavor. Dried thyme is also a suitable substitute; remember, adjust the quantity!
-
1 teaspoon salt: Essential for flavor! It also helps control yeast fermentation. If you’re watching your sodium, consider a salt substitute or using less.
-
1 teaspoon active dry yeast: The magic behind your bread’s rise! Make sure it’s fresh—if it’s been around a while, check its potency by dissolving it in warm water with a pinch of sugar. If it bubbles up, you’re good to go!
-
¾ cup warm water: This will activate your yeast. Make sure it’s warm, not hot; around 110°F (43°C) is perfect. Too hot, and your yeast might get cooked!
-
1 tablespoon olive oil: Adds richness and flavor, plus it keeps your bread from becoming too dry. You can swap it out with melted butter if you prefer a different taste.
These simple, wholesome ingredients are all about letting the flavors shine. The combination of herbs and olives creates a wonderfully fragrant loaf, perfect for any occasion.
Step-by-Step Instructions
Now that we’ve gathered our star ingredients, it’s time to play! Let’s get baking:
-
Activate the Yeast: In a small bowl, mix the warm water and yeast. Let it sit for about 5-10 minutes until it becomes frothy. This is your yeast waking up and getting ready to work its magic. If it’s not foamy, you might need to start again.
-
Mix the Dry Ingredients: In a large mixing bowl, combine the bread flour and salt. Give it a stir to evenly distribute the salt, which helps in flavor and controls yeast activity.
-
Combine Wet and Dry Ingredients: Once your yeast is frothy, add it to the flour mixture along with the olive oil. Stir everything together with a wooden spoon or your hands. Don’t worry about perfection here; we’re going for a tousled dough.
-
Incorporate the Olives and Herbs: Gently fold in the chopped olives, rosemary, and thyme. This is where the magic happens—when those herbs and olives get mixed into the dough, the aroma will fill your kitchen! It’s like a little preview of the deliciousness to come.
-
Knead the Dough: Turn the dough out onto a lightly floured surface. Knead for about 8–10 minutes until it’s smooth and elastic. If you’ve never kneaded before, it’s like giving the dough a warm hug to develop its gluten. If it’s sticking too much, sprinkle a tiny bit of flour, but try not to add too much.
-
The First Rise: Form the dough into a ball and place it in a lightly greased bowl. Cover it with a clean kitchen towel and let it rise in a warm spot for about 1 hour or until it doubles in size. This is the perfect time to clean up the kitchen or whip up a quick dipping oil!
-
Shape the Bread: Once risen, punch down the dough to release the air (trust me, it feels great!). Shape it into a loaf or divide it into smaller portions for rolls. The shaping can be as rustic or as neat as you prefer.
-
The Second Rise: Place your shaped dough on a parchment-lined baking sheet. Cover it again and let it rise for another 30-45 minutes. This second rise will give your bread that light, airy texture.
-
Preheat the Oven: While the dough rises, preheat your oven to 375°F (190°C). This step is essential—it’s like giving your bread a warm welcome into the oven!
-
Bake the Bread: Once your dough has doubled in size again, pop it in the oven and bake for 25-30 minutes, or until golden brown. You can tell it’s done when it sounds hollow when you tap the bottom.
-
Cool and Enjoy: Let the bread cool on a wire rack for at least 10 minutes before slicing. This waiting period encourages the flavors to set. Use this time to whip up your favorite dipping oil or enjoy some simple butter!
Serving Suggestions
Olive Herb Bread is so versatile and can be served in various ways. Slice it thick and serve with olive oil and balsamic vinegar for dipping, perfect for a cozy night in. Toast it for breakfast with a spread of cream cheese or enjoy it alongside soups and salads. You can even tear off chunks for a fun sharing experience during family dinners. However you serve it, this bread is sure to be a showstopper!
Recipe Variations
Feeling adventurous? Here are a few creative twists to try with your Olive Herb Bread:
- Cheesy Delight: Add a cup of shredded cheese, like feta or Parmesan, into the dough for a savory surprise.
- Sun-Dried Tomato Infusion: Swap the olives for sun-dried tomatoes for a different flavor profile.
- Garlic Addition: Toss in some minced garlic or roasted garlic for that extra flavor kick!
- Nutty Crunch: Add a handful of chopped walnuts or pine nuts for texture and healthy fats.
- Gluten-Free Version: Use a 1-to-1 gluten-free flour blend to make it gluten-free, keeping an eye on the hydration of the dough as you may need to adjust the water.
Chef’s Notes
This recipe has become a staple in my kitchen, but it’s evolved over time. Initially, I’d stick to just olives and herbs, but as I brought friends and family into the mix, I started experimenting. I embraced the concept of pantry-cleaning and realized that the beauty of this bread lies in its adaptability. Now, I love letting my creativity run wild with whatever I have on hand!
A funny kitchen story? The first time I made this bread by myself, I forgot the salt. It was a lesson learned: good bread needs that little bit of seasoning! That batch ended up as a great base for crostini, topped with tomatoes and basil. So, turn those "oops" moments into opportunities!
FAQs and Troubleshooting
1. My bread didn’t rise; what went wrong?
Check your yeast! If it’s old or not activated properly, the rise will be affected. Make sure you use warm water and allow the yeast to froth up before mixing it into the dough.
2. The bread turned out too dense. What happened?
This can occur due to under-kneading or adding too much flour during the kneading process. Remember, dough should be slightly tacky but not overly sticky.
3. Can I freeze the bread?
Absolutely! Slice your Olive Herb Bread and wrap it tightly in plastic wrap. Store in a freezer bag to keep it fresh for up to three months. Thaw it overnight in the fridge for best results.
4. How can I tell when the bread is done baking?
You can tap the bottom of the loaf; it should sound hollow. Additionally, the crust should be golden brown—such a pleasant sight!
Nutritional Info
As with all baked goods, portion control is key! Here’s a rough breakdown per slice (based on roughly 12 slices):
- Calories: 150
- Total Fat: 3g
- Carbohydrates: 30g
- Fiber: 2g
- Protein: 4g
Remember, these are estimates and can vary based on the exact ingredients and amounts used.
So there you have it—a hearty, vibrant Olive Herb Bread that brings a touch of joy and nostalgia to your kitchen. I hope this recipe inspires you to create and share your own stories around the dinner table. Remember to sprinkle a little extra love into everything you bake! Happy baking, friends!
PrintOlive Herb Bread
A nostalgic recipe for Olive Herb Bread, combining savory olives and aromatic herbs for a delightful loaf.
- Prep Time: 15 minutes
- Cook Time: 30 minutes
- Total Time: 45 minutes
- Yield: 12 slices 1x
- Category: Bread
- Method: Baking
- Cuisine: Mediterranean
- Diet: Vegetarian
Ingredients
- 2 cups bread flour
- 1 cup pitted olives
- 1 tablespoon fresh rosemary
- 1 tablespoon fresh thyme
- 1 teaspoon salt
- 1 teaspoon active dry yeast
- ¾ cup warm water
- 1 tablespoon olive oil
Instructions
- Activate the yeast: In a small bowl, mix the warm water and yeast and let it sit for 5-10 minutes until frothy.
- Mix the dry ingredients: In a large bowl, combine the bread flour and salt.
- Combine wet and dry ingredients: Add the frothy yeast to the flour mixture along with olive oil; stir to combine.
- Incorporate the olives and herbs: Fold in the chopped olives, rosemary, and thyme.
- Knead the dough: Turn out onto a floured surface and knead for 8-10 minutes until smooth.
- The first rise: Shape into a ball, place in a greased bowl, cover, and let rise for 1 hour.
- Shape the bread: Punch down the dough, shape it into a loaf or smaller rolls.
- The second rise: Place on a parchment-lined baking sheet, cover, and let rise for 30-45 minutes.
- Preheat the oven: While the dough rises, preheat to 375°F (190°C).
- Bake the bread: Bake for 25-30 minutes until golden brown and hollow-sounding when tapped.
- Cool and enjoy: Let cool on a wire rack for at least 10 minutes before slicing.
Notes
Olive Herb Bread is versatile; serve with dipping oil, alongside soups, or toasted for breakfast.
Nutrition
- Serving Size: 1 slice
- Calories: 150
- Sugar: 0g
- Sodium: 200mg
- Fat: 3g
- Saturated Fat: 0g
- Unsaturated Fat: 2g
- Trans Fat: 0g
- Carbohydrates: 30g
- Fiber: 2g
- Protein: 4g
- Cholesterol: 0mg
Keywords: bread, olive bread, herb bread, baking, Mediterranean