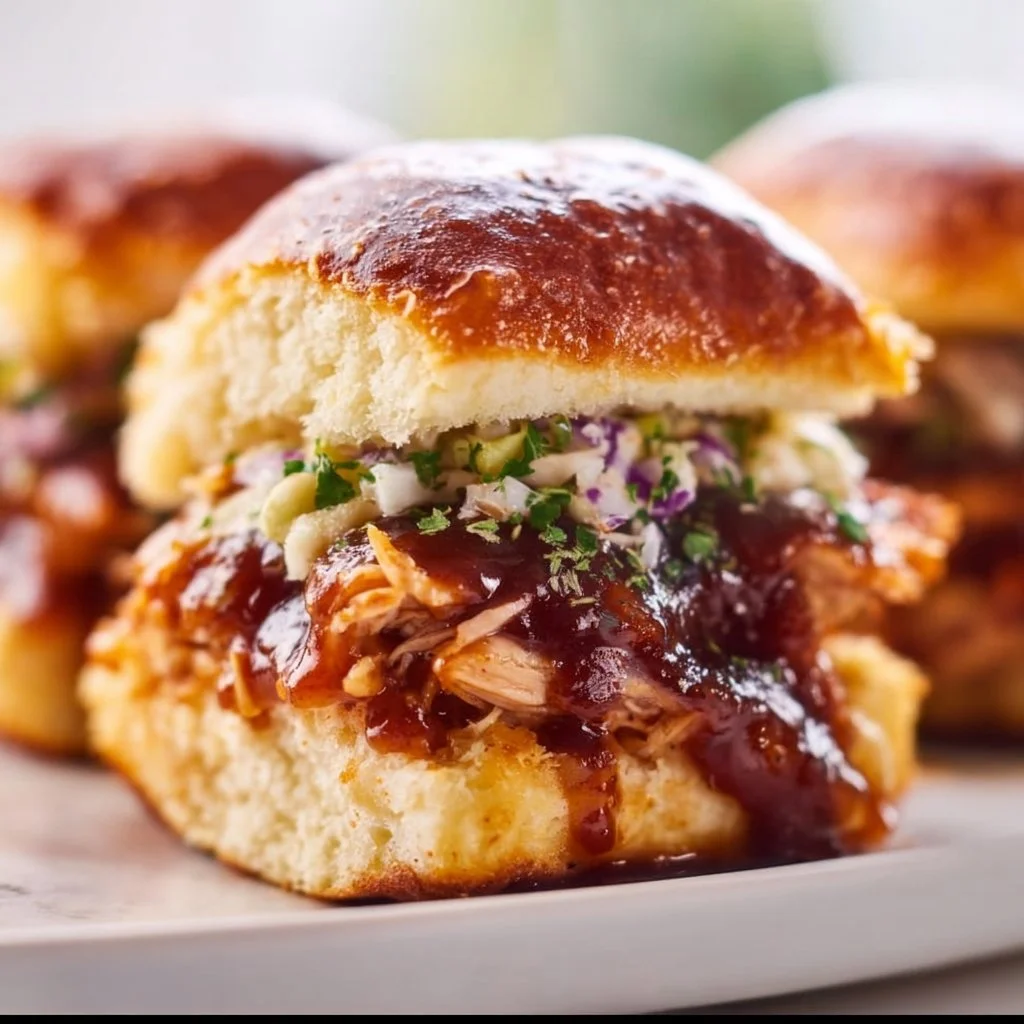
BBQ Chicken Sliders: A Fun Twist on a Classic
Hey there, friends! 💖 I’m so excited to share a recipe with you today that always brings smiles and full bellies. I’m talking about BBQ Chicken Sliders! These little delights are perfect for gatherings, game days, or just a cozy night in. Each slider is a juicy explosion of flavor, smothered in tangy BBQ sauce and oozing with melting Gouda cheese. Seriously, what’s not to love?
You’re probably wondering where I got this obsession with sliders. Well, let me take you on a little journey down my memory lane. A few years back, I was invited to a friend’s summer BBQ. Picture this: a backyard filled with laughter, the scent of grilled meat wafting through the air, and the sun shining down just right. My friend’s mom had made the most incredible BBQ chicken sliders I’ve ever tasted. I mean, they were the stars of the show!
You know that moment when you take a bite, and everything just clicks? The sweet and smoky BBQ sauce mixed with that gooey cheese and soft roll was pure bliss. I remember asking for the recipe, and after some playful kitchen banter, she agreed to share her secrets. Now, every time I whip up these sliders myself, it’s like a warm hug from that beautiful summer day, fueled by the magic of good food and great company. Let’s dive into the fun of making these delicious BBQ Chicken Sliders together!
Ingredients
Here’s what we’ll need to create our tasty BBQ Chicken Sliders. Trust me, the simplicity of these ingredients is part of the charm!
-
2 cups cooked shredded chicken
Chef Insight: You can use rotisserie chicken for ease or slow-cook some chicken breasts. The cooked chicken should be tender and ready to soak up all that BBQ goodness! -
1 cup BBQ sauce
Substitution tip: Use your favorite brand or homemade version. You can even mix flavors—maybe sweet and spicy? -
8 slices Gouda cheese
Flavor insight: Gouda melts beautifully and has a creamy texture. If you prefer something sharper, try cheddar! -
12 Hawaiian rolls
Pro tip: The soft, slightly sweet texture of Hawaiian rolls is perfect for sliders. But if you can’t find them, any soft dinner roll will do. -
1/4 cup diced onion
Chef hack: Soaking your diced onions in cold water for about 10 minutes before using them can help mellow out the flavor if you’re not a huge onion fan! -
1/4 cup chopped cilantro
Substitution: If you’re not a cilantro lover, fresh parsley works just as well to add a pop of color and freshness! -
1/4 cup butter
Did you know? Butter adds richness and helps crisp the tops of the rolls. You’ll thank me later for this! -
1 teaspoon garlic powder
Garlic lovers unite! This adds a wonderful flavor depth. You can also use fresh minced garlic if you prefer. -
1 teaspoon dried herbs (such as thyme or oregano)
Chef tip: Adding herbs gives a lovely aromatic touch. Feel free to experiment with what you have on hand!
Step-by-Step Instructions
Alright, let’s get cooking! Follow my lead, and I promise these sliders will become a household favorite. Here we go!
-
Prep the Chicken: If you haven’t yet, shred your chicken. This step is crucial because the more finely shredded your chicken is, the better it will soak up that BBQ sauce. It’ll make for a more harmonious slider experience!
-
Mix the Goodness: In a large mixing bowl, combine the shredded chicken and BBQ sauce together until fully coated. Let it sit for about 5-10 minutes. This step allows all those flavors to marry and get to know each other like old friends!
-
Assemble the Rolls: While the chicken soaks up the sauce, it’s time to get our rolls ready. Take your Hawaiian rolls and slice them in half horizontally. Place the bottom halves in a greased baking dish.
-
Layer with Cheese: Lay 4 slices of Gouda cheese over the bottom halves of the rolls. This cheesy base creates a delightful meltiness that pairs beautifully with the BBQ chicken.
-
Spoon on the Chicken: Layer the BBQ chicken mixture evenly over the cheese, making sure every bite will be packed with flavor. Sprinkle the diced onions and chopped cilantro on top of the chicken for an added crunch and freshness.
-
Top it Off: Place the remaining 4 slices of Gouda cheese over the chicken mix. This will add another cheesy layer, which is always a good idea! Then, pop the top halves of the rolls back on.
-
Butter Time: In a small bowl, melt your butter and stir in the garlic powder and dried herbs. Use a brush to generously apply this mixture over the top of the assembled sliders. This will give you a gorgeous golden brown finish and a delicious flavor!
-
Bake Away: Preheat your oven to 350°F (175°C) and bake the sliders for about 20 minutes, or until they are bubbly and golden brown. Keep an eye on them; you’ll want that cheese to melt perfectly without over-baking!
-
Slice and Serve: Once they’re out of the oven, let the sliders sit for a few minutes. This helps them hold their shape. Cut between each slider, and voila! You have a tray of deliciousness just waiting to be devoured.
Serving Suggestions
Serving BBQ Chicken Sliders is where the fun really begins! You can arrange them on a platter, garnished with extra chopped cilantro and a drizzle of BBQ sauce for presentation. Pair them with some crispy sweet potato fries or a fresh coleslaw to balance the flavors. Trust me; these sliders are perfect for sharing—in fact, I highly recommend it because they disappear fast!
Recipe Variations
Here are a few fun twists to elevate your BBQ Chicken Sliders even more:
-
Tri-Flavor Sliders: Create a slider medley by mixing BBQ sauce with ranch or buffalo sauce for varied flavor profiles.
-
Veggie Version: Swap the chicken for jackfruit or a mix of roasted vegetables for a delicious vegetarian alternative.
-
Spicy Kick: Add sliced jalapeños or a splash of hot sauce to the BBQ chicken for an extra spicy kick.
-
Cheesy Mix-Up: Experiment with different cheeses! Pepper Jack or fontina can add new dimensions to flavor.
-
Gluten-Free Option: Serve the BBQ chicken mixture in lettuce wraps for a low-carb, gluten-free alternative perfect for any occasion.
Chef’s Notes
Making BBQ Chicken Sliders is always a joy for me. Every time I prepare them, I can’t help but reminisce about that fabulous BBQ at my friend’s house. It’s funny how food holds memories, right? I’ve seen this recipe evolve over the years—from experimenting with different cheeses to creating fun variations for seasonal parties. Who knew such a simple recipe could bring so much happiness? Each slider is an invitation to create moments worth sharing with friends and family.
FAQs and Troubleshooting
1. My sliders didn’t hold together! What happened?
This can happen if the chicken is too moist or if the rolls are overly soft. Be sure to measure your BBQ sauce, and you can always use less if needed. Also, allowing the sliders to rest for a few minutes after baking can help them hold their shape.
2. How do I store leftovers?
Leftover sliders can be stored in an airtight container in the fridge for up to three days. However, I recommend reheating them in the oven to keep the buns from getting soggy!
3. Can I freeze these sliders?
Absolutely! You can assemble everything (without baking) and freeze them before cooking. Just thaw them in the refrigerator overnight before baking, and you’ll have sliders ready to go anytime!
4. What if I want to make these sliders gluten-free?
No problem! Use gluten-free rolls or simply serve the BBQ chicken mixture in lettuce wraps or over quinoa instead.
Nutritional Info
(Each slider approximate values may vary based on ingredients)
- Calories: 200
- Protein: 14g
- Fat: 10g
- Carbohydrates: 20g
And there you have it—BBQ Chicken Sliders that will surely become a staple at your table! There’s nothing quite like gathering around good food and sharing laughter, and these sliders are the perfect conversation starter. They’re not just delicious; they come with a sprinkle of nostalgia and a generous dollop of joy! So go ahead, give this recipe a try, and bring a taste of happiness to your kitchen. Can’t wait to hear how it turns out for you! Happy cooking! 🍽️✨
PrintBBQ Chicken Sliders

Delicious BBQ Chicken Sliders perfect for gatherings, game days, or cozy nights in.
- Prep Time: 10 minutes
- Cook Time: 20 minutes
- Total Time: 30 minutes
- Yield: 12 sliders 1x
- Category: Appetizer
- Method: Baking
- Cuisine: American
- Diet: Carnivore
Ingredients
- 2 cups cooked shredded chicken
- 1 cup BBQ sauce
- 8 slices Gouda cheese
- 12 Hawaiian rolls
- 1/4 cup diced onion
- 1/4 cup chopped cilantro
- 1/4 cup butter
- 1 teaspoon garlic powder
- 1 teaspoon dried herbs (such as thyme or oregano)
Instructions
- Prep the chicken: Shred your chicken to soak up that BBQ sauce.
- Mix the goodness: Combine shredded chicken and BBQ sauce in a bowl and let it sit.
- Assemble the rolls: Slice your Hawaiian rolls in half horizontally and place the bottoms in a greased baking dish.
- Layer with cheese: Add 4 slices of Gouda cheese over the bottom halves of the rolls.
- Spoon on the chicken: Layer the BBQ chicken mixture evenly over the cheese.
- Top it off: Place the remaining Gouda slices over the chicken mix and put the top halves of the rolls back on.
- Butter time: Melt the butter and stir in garlic powder and dried herbs, then brush over the top of the sliders.
- Bake away: Preheat the oven to 350°F (175°C) and bake for about 20 minutes, until bubbly and golden brown.
- Slice and serve: Let sliders sit for a few minutes, then cut and enjoy!
Notes
Leftover sliders can be stored in an airtight container in the fridge for up to three days. Reheat in the oven to maintain bun texture.
Nutrition
- Serving Size: 1 slider
- Calories: 200
- Sugar: 6g
- Sodium: 600mg
- Fat: 10g
- Saturated Fat: 5g
- Unsaturated Fat: 3g
- Trans Fat: 0g
- Carbohydrates: 20g
- Fiber: 1g
- Protein: 14g
- Cholesterol: 30mg
Keywords: BBQ Chicken Sliders, easy sliders, party food