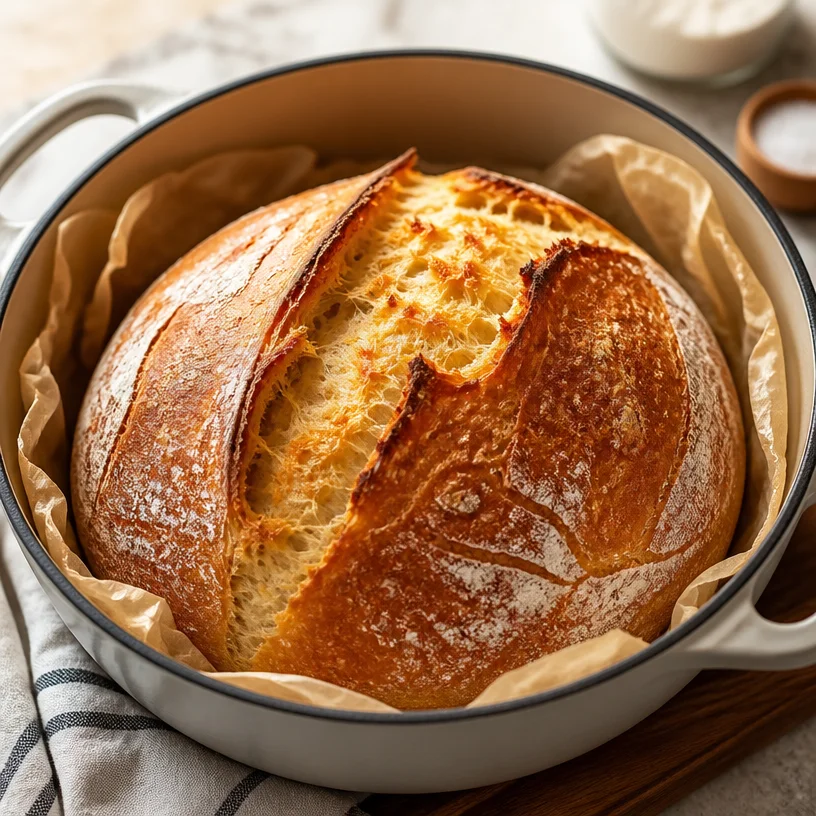
Unleashing the Magic of Dutch Oven Bread: A Journey into Comfort Cooking
Hey there, food-loving friends! Welcome back to my little slice of Sprinkle Spoon—a place where deliciousness meets fun! Today, we’re diving into the warm, crusty world of Dutch oven bread. You might be wondering: “What’s so special about making bread in a Dutch oven?” Well, let me tell you; this method turns a simple loaf into a crunchy, artisan masterpiece right in the comfort of your home. Whether you’re a seasoned baker or just looking to impress at your next brunch get-together, I’ve got you covered!
Imagine stepping into your kitchen and being met with the irresistible aroma of freshly baked bread—a divine smell that wraps around you like a warm hug. The crust is golden, the inside is fluffy and soft, and best of all, you made it from scratch! What’s the secret ingredient, you ask? Well, it’s a pinch of patience mixed with a sprinkle of creativity.
Baking bread might seem intimidating at first, but trust me, it’s one of those magical experiences where the rewards far outweigh the effort. After a bit of kneading, rising, and tending to your dough, the satisfaction you feel when pulling that gorgeous loaf out of the oven is unparalleled. Let’s journey through this warm, comforting recipe together and bring some homemade joy into our lives!
A Slice of Nostalgia
Let me share a story that’s close to my heart. It was a chilly Sunday afternoon, and I was a wide-eyed kid, swaying between playing outside and finding the coziest corner of our kitchen. My mom had her trusty Dutch oven, a cast-iron beauty that glimmered with memories of countless family recipes. That day, as she boiled water for soup, she decided to whip up a loaf of bread on a whim.
I remember watching her expertly knead the dough on our worn wooden countertop, flour dusting her apron and the air thick with anticipation. While it rose, we played games and sipped hot chocolate, the smell of the rising bread mingling with the steam from the kettle. When the timer beeped, my heart raced. “Let’s see what we’ve created!” she exclaimed, opening that Dutch oven.
What emerged was nothing short of magical—golden and crusty on the outside, soft and fluffy within. We slathered it with butter, and I swear it was one of the best things I ever tasted. That loaf had the power to transform a cold day into a cozy memory, and from that moment on, I knew that baking bread was more than just food—it was about love, family, and creating moments we cherish. Fast forward to today, and I recreate that same magic in my own kitchen with my family and friends.
Are you excited to craft some of your own memories? Let’s gather our ingredients and get this dough rising!
Ingredients
Here’s what you’ll need to make your very own Dutch oven bread:
-
Bread Flour: This is your main ingredient! Bread flour has a higher protein content than all-purpose flour, which gives your bread that delicious chewiness. If you’re out of bread flour, don’t fret—substituting with all-purpose flour works fine, but the texture will change slightly.
-
Yeast: It’s the magical ingredient that helps our bread rise! You can use active dry yeast or instant yeast. If you’re using active dry yeast, remember to activate it in warm water before mixing. If you’re out of yeast, try a sourdough starter, though the process will take longer.
-
Water: Warm water is a must—it helps activate the yeast for delightful rising action. Too hot or too cold water can hinder fermentation, so aim for about 110°F (43°C). If you want to jazz it up, you can replace some of the water with milk for a richer flavor.
-
Salt: Salt isn’t just for flavor; it strengthens the dough structure. It also helps control the fermentation of the yeast. If you’d like to reduce sodium, feel free to use a salt substitute or simply lower the amount used.
Let’s roll up those sleeves and dive into creating a delicious masterpiece!
Step-by-Step Instructions
1. Mix & Combine the Dry Ingredients
In a large mixing bowl, combine 3 cups of bread flour and 2 teaspoons of salt. Whisk them together until they are fully incorporated—this is the base of your bread and where the magic begins.
2. Activate the Yeast
In a separate bowl, combine 2 teaspoons of yeast with 1 and ½ cups of warm water. Let it sit for about 5-10 minutes, allowing the yeast to bubble and froth. This is a crucial step—make sure it’s active! If there are no bubbles, your yeast may be expired, and it’s time to start fresh.
3. Combine Wet and Dry Ingredients
Once your yeast is bubbly, pour it into the bowl with the flour mixture. Use a wooden spoon or spatula to combine until a shaggy dough forms. Don’t be afraid—this dough will look quite sticky!
4. Knead the Dough (Your Workout for the Day!)
Turn the dough out onto a floured surface and knead for about 10 minutes until it feels smooth and elastic. A little flour wherever the dough sticks is fine, but try to keep it minimal. Think of it like a mini workout session—your arms will thank you later!
5. First Rise
Place your dough in a greased bowl and cover it with a kitchen towel or plastic wrap. Let it rise in a warm place for about 1 to 2 hours, or until it doubles in size. Pro tip: If it’s a chilly day, you can turn your oven on low for a couple of minutes, then turn it off. Place your dough inside to rise!
6. Shape the Dough
Once your dough has risen beautifully, punch it down and turn it out onto a lightly floured surface. Shape it into a round loaf by pulling the edges into the center and tucking them under. This helps build structure, which is key to a nice crust.
7. Second Rise
Cover the shaped dough with a towel and let it rise again for about 30-60 minutes until it puffs up again—patience is key here!
8. Preheat the Dutch Oven
While the dough is rising, preheat your oven to 450°F (232°C) with your Dutch oven inside. This helps to create that beautiful crust we all know and love.
9. Bake the Bread
Once preheated, carefully remove the Dutch oven (it will be hot, so use oven mitts!). Gently place your dough inside, cover it with the lid, and pop it back in the oven. Bake for 30 minutes with the lid on. This creates steam and gives you a glorious crust. After 30 minutes, remove the lid and bake for an additional 15-20 minutes until golden brown.
10. Cool & Enjoy
Once out of the oven, let it cool on a wire rack for at least 30 minutes before slicing. Trust me, waiting is tough, but it allows the crumb structure to finish setting! This is the hardest part, but it’s worth the wait to enjoy that warm, crusty loaf!
Serving Suggestions
When it comes to serving, the options are endless! A classic pat of butter melting into a hot slice is always a winner. You could also pair it with a hearty soup, enjoy it with some jam, or use it to make the ultimate grilled cheese sandwich! Want to feel extra fancy? Serve it with an olive oil dipping sauce or some fresh herbs. Get creative; your taste buds will thank you!
Recipe Variations
-
Herb-Infused Bread: Add 1-2 tablespoons of dried herbs (like rosemary or thyme) to the dry ingredients for a fragrant twist.
-
Whole Wheat Twist: Substitute half of the bread flour with whole wheat flour for a nuttier flavor.
-
Cheddar and Chive: Fold in shredded cheddar and chopped chives for a cheesy, savory delight.
-
Olive and Rosemary: Add diced olives and fresh rosemary to the dough for a Mediterranean touch.
-
Sweet Cinnamon Raisin Bread: Mix in some cinnamon and raisins for a sweet spin on breakfast toast!
Chef’s Notes
I have to confess—every time I bake this bread, I can’t help but sprinkle in a little more personality. Sometimes I add cheese, or a dash of garlic powder, just because it feels right. Bread baking has come a long way from Mom’s kitchen, and every batch is an opportunity to infuse your own unique twist. Plus, let’s be real: nothing beats that moment when you slice into a warm loaf and hear that satisfying crunch!
Also, a major shout-out to my sourdough friends out there! While this recipe is a quick yeast bread, I’m always inspired by the patience and love that goes into a good sourdough starter. One day, I’ll venture into that world, but for now, I’m just happily baking this delicious loaf!
FAQs and Troubleshooting
Q: My bread didn’t rise! What went wrong?
A: This could be due to inactive yeast, which happens sometimes if it’s expired or if the water temperature was too hot or too cold. Always double-check your yeast before starting!
Q: How can I store my leftover bread?
A: It’s best stored at room temperature in a paper bag to avoid moisture build-up. If you want to keep it longer, slice it and freeze. Just pop slices in the toaster for a quick breakfast!
Q: Why is my crust too hard?
A: This might be due to overbaking. Each oven can be different, so keep an eye on it. A crusty loaf is important, but it shouldn’t feel like a rock!
Q: Can I enhance the flavor of the bread?
A: Absolutely! Consider adding a bit of sugar or different herbs into the mix. Spending a little time experimenting can lead you to discover new favorites!
Nutritional Info
(If you wish to include this, here’s a sample format)
- Serving Size: 1 slice
- Calories: 120
- Carbohydrates: 25g
- Protein: 4g
- Fat: 0.5g
- Fiber: 1g
- Sodium: 210mg
And there you have it, my friends—a deliciously simple adventure into Dutch oven bread baking! I can’t wait to hear about your baking triumphs (and maybe the occasional kitchen mishap!). Remember, the most important ingredient is always love and laughter. So grab your apron, fire up the oven, and let’s make some fantastic memories, one loaf at a time! Happy baking! 🍞❤️
PrintDutch Oven Bread

A warm, crusty Dutch oven bread that transforms simple ingredients into an artisan masterpiece.
- Prep Time: 15 minutes
- Cook Time: 45 minutes
- Total Time: 60 minutes
- Yield: 1 loaf 1x
- Category: Baking
- Method: Baking
- Cuisine: American
- Diet: Vegetarian
Ingredients
- 3 cups bread flour
- 2 teaspoons salt
- 2 teaspoons yeast
- 1 and ½ cups warm water
Instructions
- Mix & Combine the dry ingredients in a large mixing bowl.
- Activate the yeast by combining it with warm water in a separate bowl.
- Combine the wet and dry ingredients to form a shaggy dough.
- Knead the dough on a floured surface for about 10 minutes.
- Place the dough in a greased bowl and cover it to rise.
- Shape the dough into a round loaf and let it rise again.
- Preheat your oven to 450°F (232°C) with the Dutch oven inside.
- Bake the bread for 30 minutes with the lid on, then an additional 15-20 minutes uncovered.
- Cool the bread on a wire rack for at least 30 minutes before slicing.
Notes
Feel free to personalize your bread with herbs, cheese, or garlic powder for added flavor.
Nutrition
- Serving Size: 1 slice
- Calories: 120
- Sugar: 0g
- Sodium: 210mg
- Fat: 0.5g
- Saturated Fat: 0g
- Unsaturated Fat: 0g
- Trans Fat: 0g
- Carbohydrates: 25g
- Fiber: 1g
- Protein: 4g
- Cholesterol: 0mg
Keywords: Dutch oven, bread, baking, artisan bread, homemade bread, crusty bread