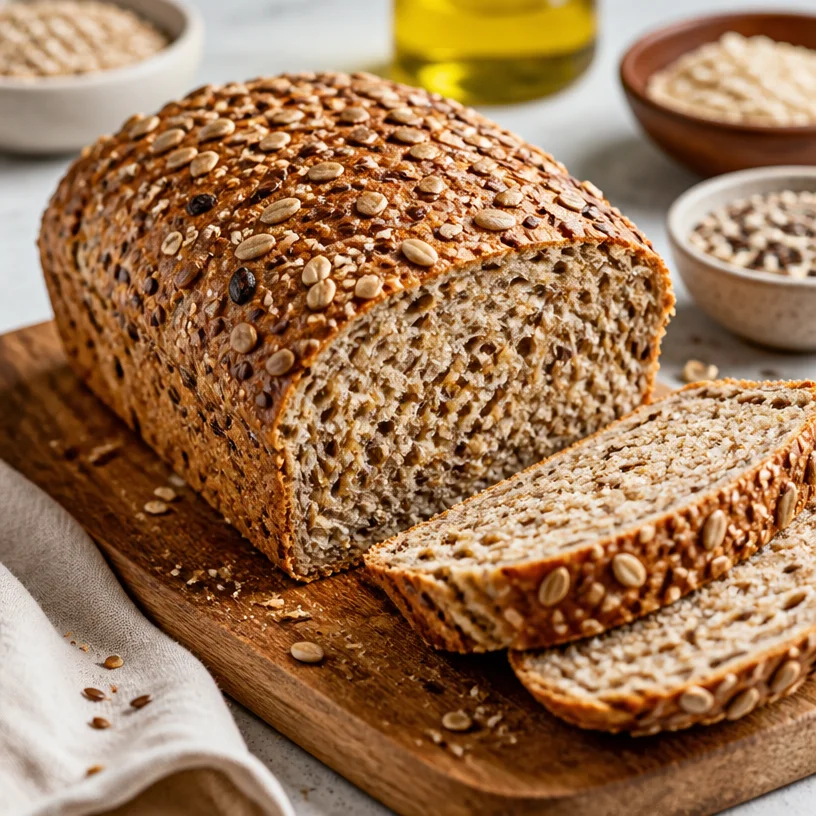
Bake Your Own Multigrain Bread: A Warm, Nutty Adventure
Ah, the aroma of freshly baked bread wafting through the kitchen—it’s like a warm hug for your senses. If you’ve ever wandered into a bakery, entranced by the scent of bread just out of the oven, you know that bread has a way of bringing people together. And today, I’m thrilled to invite you into my cozy kitchen to explore the wonderful world of multigrain bread.
Making multigrain bread at home isn’t just about unleashing your inner baker; it’s also about nourishing your body with wholesome grains and seeds while savoring the delectable flavors they offer. Imagine slicing into a crusty loaf, revealing a soft, chewy interior speckled with delightful textures. Sounds dreamy, right?
Not only is multigrain bread packed with different nutrients, but it also celebrates the art of baking by allowing us to play with flavors. Plus, there’s something extra special about creating your culinary masterpiece. So roll up your sleeves, grab your apron, and let’s dive headfirst into making this delightful bread together!
Whether you want to toast it for breakfast, craft sandwiches for lunch, or simply enjoy a slice with butter, multigrain bread deserves a spotlight on your kitchen table. I promise that once you smell that warm, toasty fragrance, you’ll understand why baking your own bread is such a rewarding adventure!
A Slice of Nostalgia
Growing up, my grandmother always had a loaf of her homemade bread cooling on the counter. The kitchen would fill with conversation and laughter while the oven worked its magic. I vividly remember us sneaking warm slices smothered in rich butter—all while my grandma shook her head, playfully chastising us for eating the bread too quickly. Those moments were special; they were filled with warmth, love, and, let’s be honest—deliciousness.
Baking multigrain bread reminds me of those carefree days spent in my grandmother’s kitchen. I still use her old mixing bowl; it’s a little scratched and worn, but it holds so many memories, just like the bread itself. The joy of sharing warm bread with loved ones is a tradition I cherish, and I’ve made it a point to pass that down. Whether for a cozy family breakfast or gathering with friends, making multigrain bread brings a sense of joy and satisfaction that you just can’t replicate with store-bought.
Ingredients That Make It All Possible
Here’s what you’ll need to whip up your delightful multigrain bread, along with some handy tips:
-
Whole Grains: (Oats, brown rice, or barley work beautifully)
Whole grains are the soul of multigrain bread, offering fiber and nutrients. If you’re in a pinch, feel free to substitute with your favorite whole grain flour or a mix of whichever grains you have on hand. -
Seeds: (Sunflower, flax, or pumpkin seeds add great texture)
Seeds amp up the nutritional factor and provide a satisfying crunch. Swap them or mix different seeds based on your preference; the sky is the limit here! -
Bread Flour: (This flour gives the structure needed)
Bread flour is stronger than all-purpose flour, allowing the bread to rise beautifully. If you’re gluten-free, a 1:1 gluten-free flour blend will work too, but keep an eye on moisture; you may need to adjust the liquid! -
Yeast: (Ensure it’s fresh for the best rise)
Instant yeast is perfect for this recipe because it’s speedy and convenient. If you’re using active dry yeast, you’ll need to proof it with warm water first. -
Honey or Sugar: (For a touch of sweetness)
A little sweetness helps feed the yeast and enhances the flavors. If you’re trying to cut down on sugar, you can omit it—your bread will still be delicious. -
Salt: (Essential for flavor and structure)
A pinch of salt is a crucial element in any bread recipe. It not only enhances flavors but also strengthens the dough. -
Water: (Warm water activates the yeast)
Use filtered water for the best outcome. Make sure it’s warm but not hot to avoid killing the yeast.
Step-by-Step Instructions to Bread Bliss
-
Prep Your Ingredients
Gather all your ingredients on a clean surface. This will streamline your process. Measure them out, and make sure your yeast is active. A quick tip: if it bubbles when added to water, you’re good to go! -
Mix the Dry Ingredients
In a large mixing bowl, combine the whole grains, bread flour, seeds, salt, and sugar or honey. Stir everything together so that the flavors can mix harmoniously. -
Activate the Yeast
In a separate bowl, add warm water and sprinkle the yeast over it. Let it rest for about 5-10 minutes until it’s frothy. This step is essential for ensuring your bread rises perfectly! -
Blend Wet and Dry
Once the yeast is bubbly, pour it into the dry mixture. Use a wooden spoon or spatula to combine until no dry bits remain. You’ll notice the dough starting to come together—yay! -
Knead the Dough
Transfer your dough to a clean, floured surface. Knead it for about 10 minutes, adding more flour if necessary until it’s smooth and elastic. This is the part where you can work out all your frustrations—trust me; it’s therapeutic! -
First Rise
Form the dough into a ball and place it in a greased bowl, covering it with a damp cloth. Let it rise in a warm spot until it doubles in size (about 1-2 hours). You can even place it in an oven preheated to the lowest setting, then turned off—it’s like a cozy bread sauna! -
Shape the Loaf
Once the dough has risen, punch it down gently to remove excess air. Transfer it again to your floured surface and shape it into a loaf. Fit it snugly into a greased loaf pan. -
Second Rise
Cover the loaf again and let it rise for about 30-45 minutes or until it has puffed up nicely. -
Preheat the Oven
While your loaf rises, preheat your oven to 375°F (190°C), creating the perfect environment for baking. -
Bake Time
When the dough has risen to your liking, pop it into your preheated oven! Bake for around 30-35 minutes, or until the crust is golden brown and sounds hollow when tapped. That’s your cue! -
Cool Down
Let the bread sit in the pan for about 10 minutes, then transfer it to a wire rack to cool completely. This part is killer, but it’s worth the wait—please don’t slice into it just yet!
Serving Suggestions
Once your masterpiece has cooled, slice it up and serve it with a pat of butter, a drizzle of honey, or your favorite jam. This multigrain bread also makes for fantastic sandwiches—layer it with some turkey, greens, and avocado for a lunch that’ll wow your taste buds!
Recipe Variations
- Herb Infusion: Add dried herbs (like rosemary or thyme) into your dough for an aromatic twist.
- Sweet Treat: Mix in some dried fruits (like cranberries or apricots) for a delightful sweetness!
- Spice It Up: Add spices like cinnamon or nutmeg to create a slightly sweet, aromatic bread perfect for breakfast.
- Fluid Swap: Use milk or a dairy alternative instead of water for a richer flavor and softer crumb.
Chef’s Notes
When I first started making bread, I had a few fails—let me tell you! There were times I mistook tablespoon for teaspoon, and well, those loaves didn’t rise much at all! But each failed attempt taught me something new about dough, patience, and flavors. Over the years, this multigrain recipe has become my go-to because it’s forgiving and allows for creativity. It’s a lovely reminder that in the kitchen, it’s all about learning and having fun—some spills are downright hilarious!
FAQs and Troubleshooting
-
Why isn’t my bread rising?
Ensure your yeast is fresh. If it doesn’t foam when mixed with water, it’s time to get new yeast! Also, check that your dough is in a warm spot during rising—yeast loves a cozy environment. -
My bread is too dense—what went wrong?
This could be due to not kneading enough. Kneading helps develop gluten, which is essential for structure. You can also ensure you’re using the right flour—bread flour is best. -
Can I freeze my bread?
Absolutely! Slice your cooled bread and wrap it tightly in plastic wrap or foil, then pop it in the freezer. It can last up to 3 months, perfect for those busy days! -
How do I store my bread?
Store your bread in a paper bag at room temperature for up to three days, or tightly wrap it in plastic if you want to keep it fresh longer. Avoid keeping it in the fridge—they tend to dry out quicker!
Nutritional Info
This multigrain bread is not only delightful but also packed with nutrients:
- Calories: Approximately 120 calories per slice
- Protein: 4g
- Fiber: 3g
- Fat: 2g
Based on your additions like seeds and nuts, you can boost its nutritional profile even more.
So there you have it—a journey to create your own delicious, heartwarming multigrain bread from scratch! As you embark on this culinary adventure, remember to embrace the process and enjoy the little moments. Happy baking! 🌾🥖
PrintBake Your Own Multigrain Bread
A delightful multigrain bread packed with nutrients and flavors, perfect for toasting or crafting sandwiches.
- Prep Time: 15 minutes
- Cook Time: 30 minutes
- Total Time: 45 minutes
- Yield: 12 slices 1x
- Category: Bread
- Method: Baking
- Cuisine: American
- Diet: Vegetarian
Ingredients
- 2 cups whole grains (oats, brown rice, or barley)
- 1 cup seeds (sunflower, flax, or pumpkin seeds)
- 4 cups bread flour
- 2 teaspoons instant yeast
- 2 tablespoons honey or sugar
- 1 tablespoon salt
- 2 cups warm water
Instructions
- Prep your ingredients by gathering them on a clean surface.
- Mix the dry ingredients in a large mixing bowl: whole grains, bread flour, seeds, salt, and sugar or honey.
- Activate the yeast by sprinkling it over warm water and letting it rest for 5-10 minutes until frothy.
- Blend the wet and dry ingredients until no dry bits remain.
- Knead the dough on a floured surface for about 10 minutes until smooth and elastic.
- First rise: Place the dough in a greased bowl, cover, and let rise until doubled in size (about 1-2 hours).
- Shape the loaf by punching down the dough and forming it into a loaf.
- Second rise: Cover and let rise again for 30-45 minutes.
- Preheat the oven to 375°F (190°C).
- Bake for 30-35 minutes until golden brown and sounds hollow when tapped.
- Cool for 10 minutes in the pan, then transfer to a wire rack to cool completely.
Notes
Experiment with different seed mixtures and add-ins to customize your bread. It’s forgiving and great for creativity.
Nutrition
- Serving Size: 1 slice
- Calories: 120
- Sugar: 1g
- Sodium: 400mg
- Fat: 2g
- Saturated Fat: 0g
- Unsaturated Fat: 1g
- Trans Fat: 0g
- Carbohydrates: 22g
- Fiber: 3g
- Protein: 4g
- Cholesterol: 0mg
Keywords: multigrain bread, homemade bread, baking bread