The Ultimate Homemade Vanilla Milkshake: A Sweet Nostalgia
Ah, the vanilla milkshake! Just the thought of it brings a smile to my face and an involuntary happy dance in my heart. From those retro diners with red leather booths to sunny afternoons spent at home, this classic treat has an irresistible charm that draws us in like no other. Making a homemade vanilla milkshake is like cuddling up with a favorite book—a comforting experience that’s as delightful as it is delicious. Whether you’re reminiscing about warm summers or simply seeking a quick cool-down, there’s something undeniably special about blending together a cool, creamy treat.
Let’s take a journey back to simpler times—where the art of making a milkshake began. Grab your blender, and let’s dive into the world of creamy goodness! Each spoonful not only tantalizes your taste buds but also brings back a sprinkle of nostalgia that makes every slurp worth it.
A Splash of Nostalgia
One of my fondest memories comes from my childhood, standing patiently at the counter of our family’s favorite ice cream parlor. The bell above the door jingled as each customer entered, and the scent of freshly whipped cream wafted through the air. I’d watch in awe as the masterful bartender poured the milk and scooped out generous dollops of vanilla ice cream into the shiny chrome blender—every movement so precise, so rhythmic. There was something utterly magical about that moment, the way the blender roared to life and the ingredients spun together into a frothy delight.
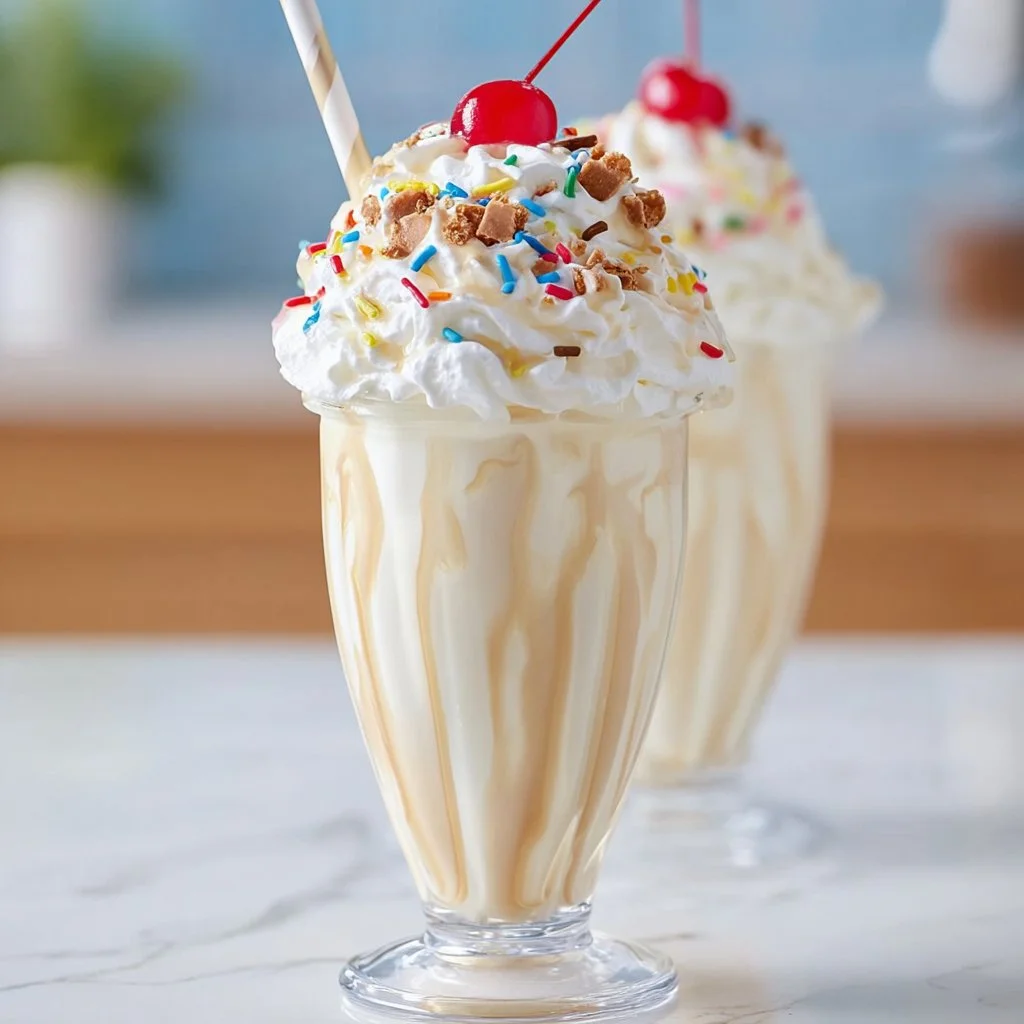
When my milkshake was finally placed before me, all garnished with a cloud of whipped cream and a cherry on top, it felt like winning the golden ticket! That first sip was a symphony of creaminess and sweetness, a blissful reminder of how simple ingredients could create something so heavenly. I knew right then and there that I wanted to create that joy in my kitchen someday. And now, here we are! Today, I’m excited to share my recipe for a classic vanilla milkshake—because everyone deserves a moment of happiness in a glass.
Ingredients for Vanilla Milkshake
Before we move on to crafting our delicious milkshake, let’s gather our ingredients. Here’s what you’ll need:
-
2 cups vanilla ice cream
- Chef’s Insight: Using high-quality ice cream makes a world of difference. Look for one that contains pure vanilla extract for maximum flavor. If you don’t have vanilla ice cream, try using cookies and cream or even chocolate as a fun alternative!
-
1 cup milk
- Substitution Tip: Whole milk will yield a thick and creamy shake, but you can swap in half-and-half for an even richer experience. For a lighter option, almond or coconut milk works beautifully too!
-
1 teaspoon vanilla extract
- Flavor Booster: Want a more intense vanilla flavor? Don’t be shy—add another splash! Vanilla bean paste is also a fantastic upscale option that adds a speckled aesthetic and depth.
-
Whipped cream (optional for topping)
- Chef’s Hack: Whipped cream is an essential for that classic milkshake look! You can make it at home by whipping heavy cream with a bit of sugar until soft peaks form, or grab a can from the store for convenience.
-
Maraschino cherry (optional for garnish)
- A Sweet Touch: It’s like the little red flag waving from the top of your milkshake, adding a perfect pop of color and flavor. Feel free to swap this for a fresh berry if you prefer something more natural!
Step-by-Step Instructions
Ready to shake things up? Let’s walk through the steps of making your homemade vanilla milkshake!
-
Prep Your Blender: Begin by ensuring your blender is clean and dry. We want a smooth blend here. It’s also helpful to pre-chill your glasses in the freezer while we work—nobody likes a warm milkshake!
-
Scoop the Ice Cream: Delicately scoop two cups of vanilla ice cream into the blender. For ease, let the ice cream sit at room temperature for about 5 minutes before scooping. This will help it blend more easily and reduce the risk of overheating your blender.
-
Pour in the Milk: Next, add in one cup of milk right over the ice cream. Start with whole milk; remember, this is your base, and it should complement your beautiful ice cream perfectly.
-
Add Vanilla Extract: Don’t forget the star of the show—your vanilla extract! Pour in that glorious teaspoon to give your milkshake that dreamy flavor we’re coveting.
-
Blend It Up: Secure the lid on your blender and start blending on a low speed. Gradually increase to medium speed until everything combines into a luscious, creamy texture. This should only take about 20-30 seconds. If it’s too thick, drizzle in more milk until you reach your desired consistency.
-
Taste Test: Here’s a moment of pure honesty—from chef to friend—take a quick taste test! If it’s not quite sweet enough, toss in a splash more vanilla extract or a spoon of powdered sugar. Blend a little longer if you add anything.
-
Serving: Pour your milkshake into pre-chilled glasses and let the deliciousness begin! If desired, dollop on a generous amount of whipped cream and place that maraschino cherry on top—maybe even toss on some rainbow sprinkles because, why not!
Serving Suggestions
Presenting your vanilla milkshake in a fun glass makes all the difference, trust me! Use clear glasses to show off your creamy swirls and colorful toppings. Serve them with elegant straws or classy teaspoons for scooping up the whipped cream. Pair your milkshake with freshly baked cookies, brownies, or even a slice of pie to create a dessert platter that will leave everyone wanting more.
Recipe Variations
If you’re looking to switch things up a bit, here are some fun variations for your vanilla milkshake:
-
Cookies & Cream Milkshake: Blend in a few chocolate sandwich cookies for an indulgent twist. Crushed or whole, either works beautifully!
-
Mint Vanilla Shake: Add a few drops of mint extract to create a refreshing minty milkshake. Top with crushed peppermint candies for an extra pop.
-
Nutty Vanilla Delight: Toss in a tablespoon or two of your favorite nut butter—peanut or almond—for a protein-packed, nutty flavor.
-
Fruity Vanilla Bliss: Blend in some fresh strawberries, mango, or banana for a fruity explosion. Fresh or frozen will work wonders!
-
Vegan Vanilla Shake: Use coconut or almond milk blended with dairy-free ice cream for a vegan-friendly version. It’s equally delicious and creamy!
Chef’s Notes
As a sprinkle enthusiast, I’ve come to cherish how versatile the vanilla milkshake recipe can truly be. Many of my kitchen experiments have evolved over the years; it was during a late-night craving that I decided to toss in an unexpected twist—think peanut butter and chocolate syrup—the combination was a game-changer! You really can’t go wrong with a milkshake; there’s always room for creativity and new experiences in each glass.
FAQs and Troubleshooting
Why is my milkshake too thick?
If your milkshake is too thick, simply add more milk, a tablespoon at a time, and blend until you reach your desired consistency.
What if my milkshake is too runny?
No worries! Just add an extra scoop of ice cream and blend again. This will help thicken it right up!
Can I prepare this milkshake in advance?
While milkshakes taste best fresh, you can prepare the mixture a few hours ahead and store it in the fridge. Just give it a quick blend again before serving!
How should I store leftover milkshake?
If you have any leftover milkshake (though, let’s be honest, this is rare!), store it in a sealed container in the freezer. Allow it to thaw a bit before trying to re-blend.
Nutritional Info
While I typically focus on the joy of food rather than its nutritional profile, here’s a rough estimate for one serving of this vanilla milkshake without toppings:
- Calories: 400-500
- Fat: 20g
- Carbohydrates: 50g
- Sugar: 40g
- Protein: 5g
Remember, each ingredient can vary in calories, so adjust accordingly based on what you use!
Now that we’ve made it through this delightful recipe together, I hope you feel inspired to whip up a vanilla milkshake that’s uniquely yours! Enjoy those happy sips, embrace your creativity, and as always, remember to sprinkle a little joy wherever you go! Cheers to sweet moments in the kitchen!
PrintThe Ultimate Homemade Vanilla Milkshake

A classic vanilla milkshake that’s creamy, nostalgic, and perfect for warm days.
- Prep Time: 10 minutes
- Cook Time: 0 minutes
- Total Time: 10 minutes
- Yield: 2 servings 1x
- Category: Dessert
- Method: Blending
- Cuisine: American
- Diet: Vegetarian
Ingredients
- 2 cups vanilla ice cream
- 1 cup milk
- 1 teaspoon vanilla extract
- Whipped cream (optional for topping)
- Maraschino cherry (optional for garnish)
Instructions
- Prep your blender: Begin by ensuring your blender is clean and dry. Pre-chill your glasses in the freezer.
- Scoop the ice cream: Scoop two cups of vanilla ice cream into the blender. Let it sit at room temperature for about 5 minutes for easier scooping.
- Pour in the milk: Add one cup of milk right over the ice cream.
- Add vanilla extract: Pour in one teaspoon of vanilla extract.
- Blend it up: Secure the lid and blend on low speed, increasing to medium until creamy, about 20-30 seconds.
- Taste test: Adjust sweetness by adding vanilla extract or powdered sugar if necessary.
- Serve: Pour into pre-chilled glasses, top with whipped cream and a cherry if desired.
Notes
For a thicker shake, use whole milk or half-and-half. Add fun mix-ins like cookies or fruit for variety.
Nutrition
- Serving Size: 1 serving
- Calories: 450
- Sugar: 40g
- Sodium: 150mg
- Fat: 20g
- Saturated Fat: 12g
- Unsaturated Fat: 6g
- Trans Fat: 0g
- Carbohydrates: 50g
- Fiber: 0g
- Protein: 5g
- Cholesterol: 80mg
Keywords: milkshake, vanilla, dessert, creamy, nostalgic