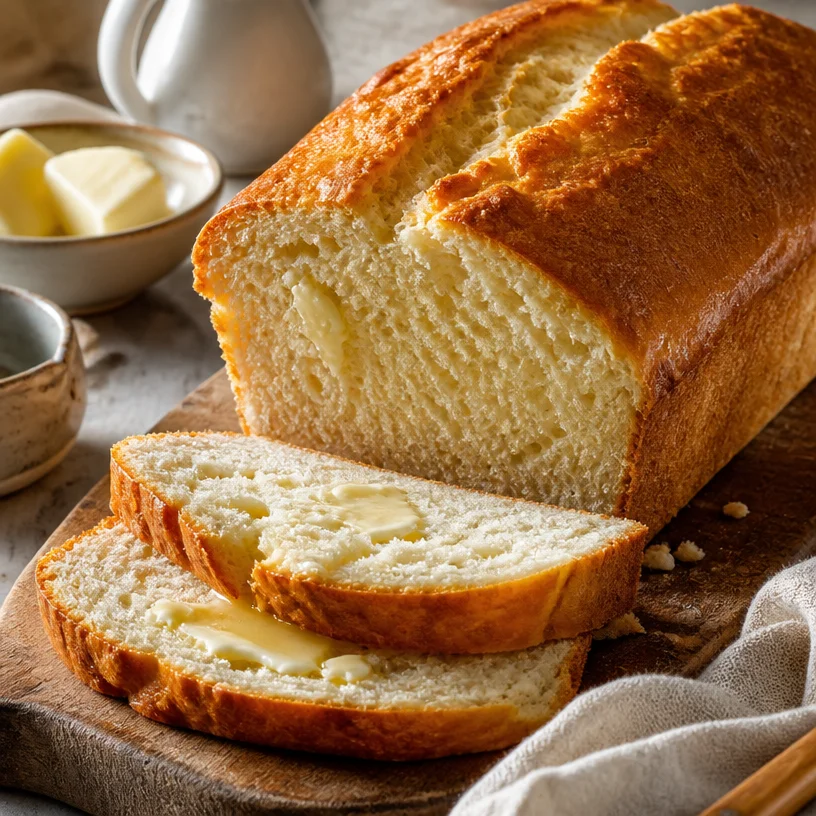
Buttermilk Bread: A Slice of Comfort and Joy
Ah, buttermilk bread! Just the sound of it makes me feel all warm and fuzzy inside. If you’ve ever inhaled the scent of warm bread wafting through your kitchen and felt that tingle of nostalgia wash over you, you know exactly what I’m talking about. This isn’t just any bread—it’s a delectable, fluffy loaf that invites you in for a big, cozy hug.
Making bread at home can feel like an intimidating endeavor, but I’m here to tell you that it’s one of the most beautiful things you can create. It’s all about taking simple ingredients and crafting them into something extraordinary. Buttermilk adds this incredible richness and tanginess to the bread, making each bite more delightful than the last. Whether you’re enjoying it fresh out of the oven or toasting it on a busy morning, this buttermilk bread is sure to elevate your culinary game.
As a sprinkle enthusiast and self-proclaimed kitchen storyteller, I’m pumped to share this recipe with you. Let’s dive into the world of buttermilk bread and unleash that inner baker we all have!
A Slice of Nostalgia
Growing up, my grandma had this magical way of turning our family kitchen into a mini bakery. Each Sunday was dedicated to baking, and the star of the show was always her buttermilk bread. I remember standing on a stool, peering over the counter as she measured out flour, her little apron dusted in flour like a badge of honor.
Adding buttermilk to the dough was like pressing a secret button that transformed the bread into something sublime. The moment it emerged from the oven, we’d gather around the kitchen, savoring that first slice still warm, smeared with a generous pat of butter. As we enjoyed that simple pleasure, laughter filled the air, and I knew I wanted to replicate that joy in my kitchen.
Years later, I still make buttermilk bread, channeling my inner grandma with every knead and fold. It’s not just about the ingredients; it’s about the memories we create, the connections we nurture, and the little moments that make life sweet. Now, let’s get you baking!
Ingredients
Here are the simple yet magical ingredients you’ll need for this buttermilk bread:
-
Buttermilk: This tangy ingredient is the star of our show! It adds moisture and richness to the bread, giving it that lovely, fluffy texture. If you don’t have buttermilk on hand, you can easily make a substitute by mixing 1 cup of milk with 1 tablespoon of white vinegar or lemon juice. Let it sit for about 5-10 minutes, and voilà—instant buttermilk!
-
All-Purpose Flour: The backbone of any bread recipe! It provides structure and texture. I recommend using unbleached all-purpose flour for a more natural flavor. You can swap in whole wheat flour for a heartier loaf, but keep in mind that you may need to adjust the liquid slightly, as whole wheat absorbs more moisture.
-
Butter: Nothing beats the flavor of real butter in bread! It not only enriches the dough but also helps in achieving that golden crust. If you’re looking for a dairy-free option, coconut oil or vegan butter can be great substitutes; just melt it before adding.
-
Yeast: The magical ingredient that makes the bread rise and gives it that fluffy, airy texture. Instant yeast works best for this recipe, as it doesn’t require proofing and gives you a quick rise. If using active dry yeast, remember to dissolve it in water before adding to the mixture.
-
Sugar: Just a touch to feed the yeast and add a slight sweetness. You can use granulated sugar, honey, or even maple syrup if you’re feeling adventurous!
-
Salt: Essential for flavor. It also controls the yeast’s activity, so don’t skip it! Sea salt or kosher salt works beautifully.
Step-by-Step Instructions
Ready to get your hands doughy? Let’s make some buttermilk bread!
-
Gather Your Ingredients: Make sure all your ingredients are at room temperature—the buttermilk should be out of the fridge for about 30 minutes before you start. Even the flour comes to life better at room temp!
-
Mix Your Dry Ingredients: In a large bowl, whisk together 4 cups of all-purpose flour, 2 teaspoons of yeast, 1 tablespoon of sugar, and 1 teaspoon of salt. This step is crucial; it ensures that the yeast is evenly distributed. I always like to make a little well in the center for the wet ingredients. It’s like making a little cozy spot for them!
-
Combine Wet Ingredients: In another bowl, mix 1 cup of buttermilk with 1/4 cup of melted butter (cooled). Pour this mixture into the well you created in the flour. Stir gently until a shaggy dough forms; use a spatula or wooden spoon for minimal mess.
-
Knead the Dough: Get your hands in there! Turn the dough onto a floured surface and knead for about 8-10 minutes. You should feel the dough start to become smooth and elastic. A little bit messy is part of the fun! If it’s too sticky, sprinkle in a bit more flour, but don’t overdo it. You want a soft dough that holds together.
-
First Rise: Lightly grease a bowl with a touch of butter or oil. Place the dough inside, cover it with a kitchen towel, and let it rise in a warm place for about an hour, or until it doubles in size. This is when the magic happens!
-
Shape the Dough: Once risen, punch it down gently to release the air. Turn it out onto a lightly floured surface and shape it into a loaf by flattening it into a rectangle, then rolling it tightly into a log. Pinch the seams to seal!
-
Second Rise: Place your shaped dough into a greased loaf pan. Cover it with a towel and let it rise again for about 45 minutes. Preheat your oven to 350°F (175°C) during this time.
-
Bake the Bread: Once the dough has risen again, bake it in the preheated oven for about 30-35 minutes, or until the top is golden and sounds hollow when tapped. Here’s a chef hack: brush the top with melted butter just before baking for an extra golden crust that smells divine!
-
Cool & Slice: Removing it from the oven is half the battle. Let the bread cool in the pan for about 10 minutes before transferring it to a wire rack to cool completely. The aroma will have you dancing in the kitchen! Once cooled, slice and enjoy the fruits of your labor.
Serving Suggestions
You can’t go wrong with a classic butter and jam, but the possibilities are endless! Serve your buttermilk bread with a generous slather of cream cheese, or whip up a simple avocado toast topped with chili flakes for a delightful brunch option. You can even toast slices for a delectable breakfast with eggs and bacon—perfect for those lazy weekend mornings!
Recipe Variations
-
Herb-Infused Buttermilk Bread: Add a tablespoon of dried herbs (like rosemary or thyme) to the dough before the first rise for a fragrant twist.
-
Cheese Lover’s Delight: Fold in 1 cup of shredded cheese (cheddar, Gouda, or Parmesan work fantastic) for a savory loaf.
-
Sweet Surprise: Mix in chocolate chips or dried fruit (like cranberries or raisins) for a sweet treat that’s perfect with a cuppa tea!
-
Whole Wheat Version: Swap half of the all-purpose flour with whole wheat flour for a healthier twist. You might need a tad more buttermilk to balance it out.
-
Spiced Bread: Sprinkle in warm spices like cinnamon or nutmeg for a cozy flavor that’s perfect with butter.
Chef’s Notes
There’s something about making buttermilk bread that always brings a smile to my face. I’ve whipped this recipe out during family gatherings, neighborhood potlucks, and even solo movie nights (hello, midnight snacks!). It never fails to impress.
One time, I decided to experiment with some leftover buttermilk—what started as a simple loaf turned into a full-blown baking challenge! Let’s just say that a few loaves didn’t quite rise, but we had a good laugh and some very happy taste-tasters. Every flop is a learning moment, and that’s what makes us better bakers!
FAQs and Troubleshooting
Q: Why didn’t my bread rise?
A: If your bread didn’t rise, the yeast might be inactive. Always check the expiration date! If you didn’t use warm enough buttermilk or a warm enough environment, try placing the dough in an oven warmed slightly, then turned off.
Q: Why is my bread dense?
A: Dense bread can happen if you added too much flour, or didn’t knead it enough. Remember, a good knead develops gluten, which is key to fluffy bread!
Q: How can I store the leftover bread?
A: To store, wrap the bread tightly in plastic wrap and keep it at room temperature for a day or two. For longer storage, slice and freeze; just pop the slices in the toaster straight from the freezer for a quick treat!
Q: Can I use milk instead of buttermilk?
A: Sure, but you’ll lose that delightful tanginess! If you’re in a pinch, mix milk with vinegar or lemon juice to mimic buttermilk.
Nutritional Info
While buttermilk bread is a tasty indulgence, here’s a rough estimate of the nutritional info per slice (not including additional toppings):
- Calories: 120
- Protein: 3g
- Fat: 4g
- Carbohydrates: 18g
- Fiber: 0g
Enjoy this bread in moderation as part of a balanced diet, and don’t forget to share it with those you love, because good food is meant for sharing.
Now, get into that kitchen and let the irresistible scent of buttermilk bread fill your home! Whether it’s the first slice or the last, each bite holds the sweet memories we create together—one loaf at a time!
PrintButtermilk Bread
A soft and fluffy buttermilk bread recipe that brings warmth and nostalgia, perfect for any occasion.
- Prep Time: 15
- Cook Time: 35
- Total Time: 50
- Yield: 1 loaf 1x
- Category: Bread
- Method: Baking
- Cuisine: American
- Diet: Vegetarian
Ingredients
- 1 cup buttermilk (room temperature)
- 4 cups all-purpose flour (unbleached)
- 1/4 cup butter, melted
- 2 teaspoons instant yeast
- 1 tablespoon sugar
- 1 teaspoon salt
Instructions
- Gather your ingredients and ensure everything is at room temperature.
- Mix your dry ingredients: whisk together the flour, yeast, sugar, and salt in a large bowl.
- Combine the wet ingredients in another bowl, mixing the buttermilk and melted butter.
- Pour the wet mixture into the dry ingredients and stir until a shaggy dough forms.
- Knead the dough on a floured surface for about 8-10 minutes until smooth and elastic.
- Place the dough in a greased bowl, cover, and let it rise in a warm place for about 60 minutes or until doubled in size.
- Shape the dough into a loaf, place it in a greased loaf pan, and let it rise for an additional 45 minutes.
- Bake in a preheated oven at 350°F (175°C) for 30-35 minutes until golden brown.
- Cool the bread in the pan for 10 minutes before transferring to a wire rack.
Notes
For a dairy-free option, substitute butter with coconut oil or vegan butter. Can add herbs, cheese, or spices for variations.
Nutrition
- Serving Size: 1 slice
- Calories: 120
- Sugar: 1g
- Sodium: 200mg
- Fat: 4g
- Saturated Fat: 2g
- Unsaturated Fat: 2g
- Trans Fat: 0g
- Carbohydrates: 18g
- Fiber: 0g
- Protein: 3g
- Cholesterol: 15mg
Keywords: buttermilk bread, homemade bread, baking, comfort food, loaf bread