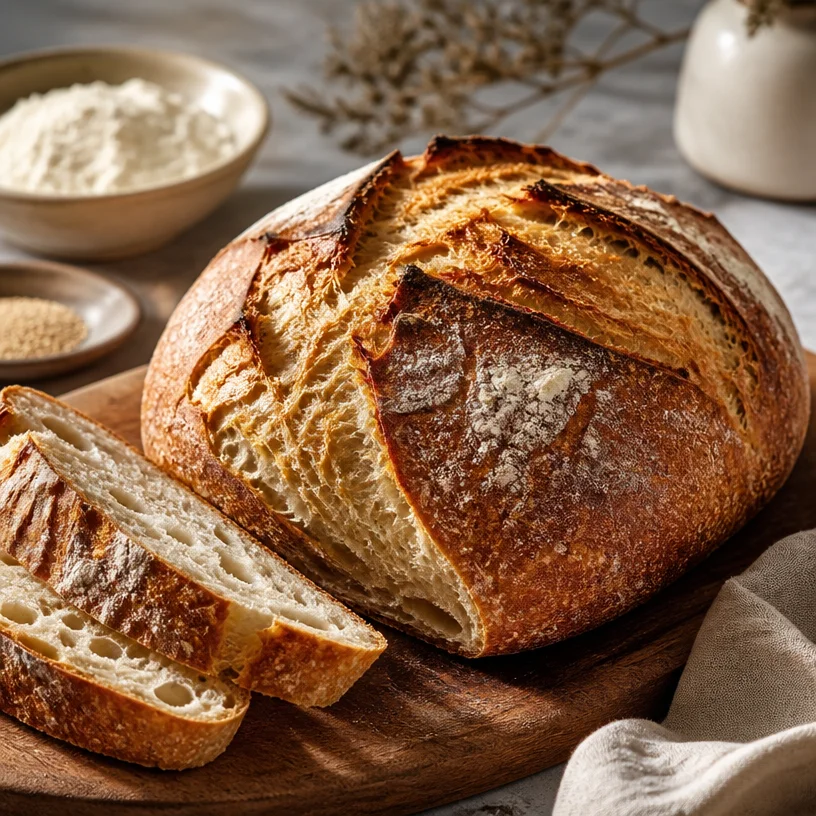
Rustic Country Bread: A Simple Journey to Homemade Happiness
Hey there, fellow food lovers! Today, let’s take a step back in time to the comforting embrace of homemade bread. There’s something magical about the warm aroma of bread baking in the oven that transforms our kitchen into a haven of joy. Rustic country bread is not just a recipe; it’s a heartfelt experience that connects us with the essence of cooking. With its crunchy crust and airy interior, this bread mirrors the simple beauty of life itself.
Picture this: it’s a Sunday afternoon, and you’re lounging in your cozy kitchen, a cup of tea by your side. The sun spills golden rays across the counter, and all you want to do is knead some dough, watch it rise, and savor the deliciousness to come. Rustic country bread embodies everything I adore about cooking—easy ingredients, a playful approach, and the warm, joyful moments shared with friends and family.
Trust me; once you take that first bite of your homemade rustic country bread, slathered with butter or dipped in olive oil, you’ll understand why this recipe has been cherished for generations. Grab your apron, and let’s bring fun and flavor to our kitchen!
Personal Story
I remember the first time I baked bread. I was a curious teenager in my grandmother’s kitchen, always captivated by her effortless ability to turn simple ingredients into culinary magic. One rainy afternoon, she decided to pass on the family’s rustic country bread recipe to me. As we floured the countertop, she shared stories of her upbringing—growing up in a little village where bread was the cornerstone of every meal. I could almost see her childhood there, surrounded by the laughter of siblings and the warmth of their family oven.
The dough was sticky, and I felt clumsy at first, but Grandma’s guidance, along with her delightful chuckle, made the entire experience feel like a warm embrace. The anticipation of watching the dough rise was a lesson in patience and joy. When the bread was finally ready, we slathered buttery goodness over those golden slices and shared it with the whole family. Every bite was a hug, a memory, and a moment that has lingered with me ever since. And now, it’s my turn to share that joy with you!
Ingredients
To create your rustic country bread, we’ll keep it simple. Here’s what you’ll need:
-
Bread Flour (4 cups): This flour has a higher protein content than all-purpose flour, creating that beautiful chewy texture we love in bread. If you’re out of bread flour, you can substitute it with all-purpose flour, but the texture may be slightly softer—still delicious!
-
Yeast (1 packet, about 2 ¼ teaspoons): Yeast is the magic ingredient that makes your bread rise and gives it that airy texture. If you can’t find active dry yeast, instant yeast works equally well—just skip the proofing step!
-
Salt (1 ½ teaspoons): Salt not only enhances the flavor of your bread but also strengthens the gluten structure. Don’t skip it! If you’re watching your sodium intake, you can reduce the salt to 1 teaspoon, but it’ll slightly affect the flavor.
-
Water (1 ½ cups, lukewarm): This will help activate the yeast and bring everything together. Aim for water that feels warm to the touch—think baby bottle warm!
Quick Chef Insight:
Remember, the quality of your ingredients matters! Choose unbleached bread flour for a richer flavor and aroma. And always make sure your yeast is fresh! If it’s old, it might not rise properly, leaving you with a dense loaf instead of that airy bliss we’re after.
Step-by-Step Instructions
Alright, let’s dive into the magic of making rustic country bread! Follow these steps, and I promise you’ll feel like a pro in no time.
-
Prepare the Yeast: In a small bowl, combine your yeast with lukewarm water. Let it sit for about 5 to 10 minutes until it becomes bubbly and frothy. This is called ‘proofing’ and tells you the yeast is alive. If it doesn’t foam, your yeast may be expired—time to grab a new packet!
-
Combine Flour and Salt: In a large mixing bowl, whisk together the bread flour and salt. This ensures even distribution of flavors and helps the salt bind properly with the flour.
-
Mix Wet and Dry: Pour the proofed yeast mixture into the flour mixture. Stir with a wooden spoon or your hands until a shaggy dough starts to form. Don’t worry about over-mixing—rustic bread is meant to be a bit rustic!
-
Knead the Dough: Turn that shaggy mess onto a floured surface. Use your hands to knead the dough for about 10 minutes. You want it to be smooth and elastic. If it’s sticking too much, sprinkle a bit more flour on the surface as you knead.
-
Let it Rise: Shape your dough into a ball and place it into a lightly oiled bowl, covering it with a damp cloth. Let it rise in a warm place for about 1 to 2 hours, or until it doubles in size. This is the perfect moment for some self-care—enjoy a cup of coffee or read a few pages of that book you’ve been wanting to dive into.
-
Shape the Dough: Once your dough has risen, gently punch it down to release the air. Turn it onto your floured surface again and shape it into a round loaf. Don’t stress over perfection—an imperfect shape gives it character!
-
Second Rise: Place the shaped dough onto a baking sheet lined with parchment paper, or into a proofing basket if you’ve got one. Cover it again with a cloth and let it rise for another 30 to 45 minutes. Preheat your oven to 450°F (230°C) during this time.
-
Score the Bread: Just before baking, use a sharp knife or a bread lame to make a few shallow slashes across the top of the loaf. This allows the bread to expand while baking and adds a beautiful rustic touch.
-
Bake to Perfection: Pop your dough in the oven for about 30-35 minutes, or until the crust is golden brown and sounds hollow when tapped. Your kitchen will smell heavenly, trust me!
-
Cool Before Slicing: Allow your bread to cool for at least 20 minutes on a wire rack before slicing. This step is crucial as it helps set the crumb and enhances the flavors.
Chef Tips:
-
Baking Stone Love: If you’re feeling adventurous, try using a baking stone for a crispier crust. Just preheat it in the oven for about an hour beforehand!
-
Steam for Crust: For an extra crunchy crust, place a pan of hot water in the bottom of your oven during baking. The steam will create that beautiful crust we all crave!
Serving Suggestions
Slice your rustic country bread and present it on a beautiful wooden board. Pair it with creamy butter, homemade jams, or even a drizzle of high-quality olive oil and a sprinkle of sea salt. It’s perfect for a cozy brunch or as an appetizer during dinner parties. The delight in seeing friends share in this simple pleasure is truly what food is all about!
Recipe Variations
Let’s get creative! Here are some fun variations you can try:
-
Herb-Infused Bread: Add a sprinkle of dried herbs like rosemary, thyme, or oregano into the dough as you mix. It adds a lovely aroma and flavor.
-
Whole Wheat Twist: Substitute half of the bread flour with whole wheat flour for a heartier version.
-
Cheesy Delight: Incorporate shredded cheese like cheddar or parmesan into the dough before the first rise for a savory twist.
-
Seeded Top: Before baking, brush the top with water and sprinkle on your favorite seeds—think sesame, poppy, or sunflower seeds!
-
Garlic Bliss: Toss some minced garlic into the dough for that comforting, garlicky goodness!
Chef’s Notes
This rustic country bread recipe has come a long way since that rainy day in my grandmother’s kitchen. It’s evolved with every bake, each loaf a little different from the last—some days it’s a little fluffier, other days a touch denser. But what has remained constant is the joy that arises from mixing, kneading, and finally tasting the fruits of our labor. Life is all about those little moments of sheer joy, and bread baking is one of my favorites!
FAQs and Troubleshooting
1. Why isn’t my bread rising?
- If your dough isn’t rising, ensure your yeast is fresh. Warm water (not hot) is also crucial for activating the yeast.
2. What if my bread is too dense?
- A dense loaf may indicate the dough was over-kneaded or didn’t rise properly. Keep an eye on the texture and ensure it becomes smooth but not overly elastic.
3. Can I make this bread ahead of time?
- Absolutely! You can shape the bread, cover it, and refrigerate it for up to 24 hours before the second rise. Just bring it back to room temperature before baking.
4. How do I store my bread?
- Once cooled, store your rustic country bread in a brown paper bag or wrapped in a clean kitchen towel to maintain its crustiness. For longer storage, you can slice it and freeze it.
Nutritional Info
While I don’t always crunch numbers, homemade bread generally contains around 120 calories per slice, with about 4 grams of protein. The beauty of making your own bread is knowing precisely what goes in it—real ingredients, no preservatives!
So there you have it! Your journey to rustic country bread is just a few steps away, and I can’t wait to hear about how it turns out. Each loaf tells a story, and I look forward to adding yours to this delicious bread-baking community. Let’s keep that oven warm and our spirits high—happy baking!
PrintRustic Country Bread
A simple and heartfelt recipe for homemade rustic country bread with a crunchy crust and airy interior.
- Prep Time: 15 minutes
- Cook Time: 35 minutes
- Total Time: 60 minutes
- Yield: 1 loaf 1x
- Category: Bread
- Method: Baking
- Cuisine: International
- Diet: Vegetarian
Ingredients
- 4 cups Bread Flour
- 1 packet (about 2 ¼ teaspoons) Yeast
- 1 ½ teaspoons Salt
- 1 ½ cups lukewarm Water
Instructions
- Prepare the yeast: In a small bowl, combine your yeast with lukewarm water. Let it sit for about 5 to 10 minutes until it becomes bubbly and frothy.
- Combine flour and salt: In a large mixing bowl, whisk together the bread flour and salt.
- Mix wet and dry: Pour the proofed yeast mixture into the flour mixture. Stir until a shaggy dough starts to form.
- Knead the dough: Turn the dough onto a floured surface and knead for about 10 minutes until smooth and elastic.
- Let it rise: Shape the dough into a ball and place it in a lightly oiled bowl. Cover with a damp cloth and let it rise for 1 to 2 hours until doubled in size.
- Shape the dough: Punch down the risen dough, turn it onto a floured surface, and shape it into a round loaf.
- Second rise: Place the shaped dough onto a baking sheet or proofing basket, cover again, and let it rise for 30 to 45 minutes while you preheat your oven to 450°F (230°C).
- Score the bread: Make a few shallow slashes across the top of the loaf just before baking.
- Bake to perfection: Place the dough in the oven for about 30-35 minutes, or until the crust is golden brown.
- Cool before slicing: Let your bread cool for at least 20 minutes on a wire rack before slicing.
Notes
For a crispier crust, use a baking stone. Add a pan of hot water in the oven for steam.
Nutrition
- Serving Size: 1 slice
- Calories: 120 per slice
- Sugar: 0g
- Sodium: 300mg
- Fat: 1g
- Saturated Fat: 0g
- Unsaturated Fat: 0g
- Trans Fat: 0g
- Carbohydrates: 25g
- Fiber: 1g
- Protein: 4g
- Cholesterol: 0mg
Keywords: bread, homemade, rustic, baking, country bread