The Creamiest Delight: Homemade Coffee Ice Cream
Ah, coffee! The magical elixir that awakens our mornings and fuels our creative pursuits. Whether it’s a lazy Sunday spent lounging around or a bustling weekday, there’s just something about sipping a steaming cup of coffee that makes everything feel a little more special. Now, imagine blending that perfect cup of coffee with the rich, creamy texture of ice cream. That, my friends, is how we dive into the delightful world of homemade coffee ice cream!
Today, I’m excited to share with you a foolproof recipe that will transform your kitchen into an ice cream parlor. And trust me, this isn’t your run-of-the-mill coffee ice cream. It’s an invitation to indulge, a scoop of joy that wraps you in nostalgia and warmth. You may have tasted many coffee desserts, but creating this homemade masterpiece is an experience all its own. Not only will you get to revel in the beauty of simplicity, but you’ll also enjoy the thrill of making something divine, with your own two hands. So grab your apron, and let’s get started building a treat that’s just as delightful as sipping that first cup of joe in the morning!
As we embark on this tasty adventure, I’d love for you to feel the same love I have for coffee and ice cream combined. This recipe is all about creating those magical moments—whether it’s sprinkling a little extra cocoa powder on top or savoring each scoop with friends. So, let’s not waste another precious moment. Let’s stir, blend, and freeze our way to the perfect homemade coffee ice cream!
A Scoop of Nostalgia
Growing up, my family had a bit of a tradition every Sunday afternoon: we would gather around the kitchen table for one special reason—homemade ice cream. My dad, with his ice cream maker and endless imagination, would whip up all sorts of flavors. We’d have everything from classic vanilla to adventurous mint chocolate chip. But guess which flavor always made the cut? Yep, you guessed it—coffee ice cream!
I can still remember sitting at the small kitchen table with my siblings, eyes wide with anticipation as the machine churned away. The air was filled with sweet, creamy aromas and that rich, robust coffee scent. Once done, we would dive into this delight and serve it in mismatched bowls. The laughter, the heartwarming conversations, and those joyful moments still linger in my memory. That’s what cooking is about—creating experiences and relishing in the simple pleasure of sharing love and laughter over food.
Now, every time I whip up a batch of coffee ice cream, I feel that wave of nostalgia wash over me. It takes me back to those sunny Sundays with ice cream dripping down our fingers and smiles plastered on our faces. So join me in recreating this classic with a sprinkle of love and a splash of creativity. Ready to create your own memories? Let’s roll!
Ingredients
Here’s what you’ll need to whip up your delightful homemade coffee ice cream:
-
2 cups heavy cream
- This is what gives our ice cream that rich, velvety texture! Don’t skimp on the creamy goodness; however, if you’re looking for a lighter version, you can substitute with half-and-half, though it won’t be quite as indulgent.
-
1 cup whole milk
- Whole milk helps balance the richness of the cream. If you’re dairy-free, almond milk or coconut milk can work too! Just remember that the creaminess will change based on what you use.
-
1 cup granulated sugar
- This sweetens the mix and helps create a smooth texture. If you want something less sweet, consider using coconut sugar for deeper flavor, or even reducing the amount to taste.
-
1 tablespoon vanilla extract
- Vanilla brings warmth and depth to our coffee ice cream. The real deal is always best, but pure vanilla extract can be a great substitute for imitation—your taste buds will know the difference!
-
1 cup strong brewed coffee
- This is where the magic happens! Fresh-brewed coffee brings out the robust flavor. Espresso or cold brew works wonderfully too! Just be sure it’s chilled before adding to the mix.
-
1/2 cup coffee beans (optional)
- For those who crave an extra kick and want added texture, tossing in some chopped coffee beans amps up those coffee notes! If you’re not a fan, feel free to skip this.
With these fresh, simple ingredients, we’re gearing up for a delightful journey that will lead to something utterly delicious! The beauty of this recipe lies in its straightforwardness, but we’re about to elevate it to a whole new level.
Step-by-Step Instructions
Ready to get mixing? Let’s walk through the steps to create this creamy coffee delight!
-
Brew Your Coffee
- Start by brewing a strong cup of coffee. If you have an espresso machine, go for a shot of espresso for an extra rich flavor! Once brewed, allow it to cool to room temperature. Chef Hack: Brew it the night before and store it in the fridge for an even easier process.
-
Combine Cream and Milk
- In a mixing bowl, whisk together the heavy cream, whole milk, and granulated sugar until the sugar is fully dissolved. This creates the perfect base for your ice cream. Tip: If you’re using an electric mixer, whip it on low speed until well blended to avoid splashes!
-
Add Coffee and Vanilla
- Next, add the strong brewed coffee and vanilla extract to the bowl. Give it a good whisk to blend everything together until it’s smooth. The mixture should be creamy and slightly frothy.
-
Chill the Mixture
- It’s time to chill! Pour the mixture into an airtight container and place it in the fridge for at least 1-2 hours. This ensures the flavors meld beautifully and helps achieve the perfect texture during churning.
-
Churn Away
- After chilling, it’s time to churn the mixture in your ice cream maker! Follow the manufacturer’s instructions, usually around 20-25 minutes, until it reaches a soft-serve consistency. Pro Tip: If using coffee beans, toss them in halfway through churning for a delightful surprise!
-
Freeze Until Firm
- Transfer the churned ice cream to a freezer-safe container. Press a piece of parchment paper directly on top (this helps prevent ice crystals), and freeze for at least 4-6 hours, or until fully firm.
-
Serve and Enjoy!
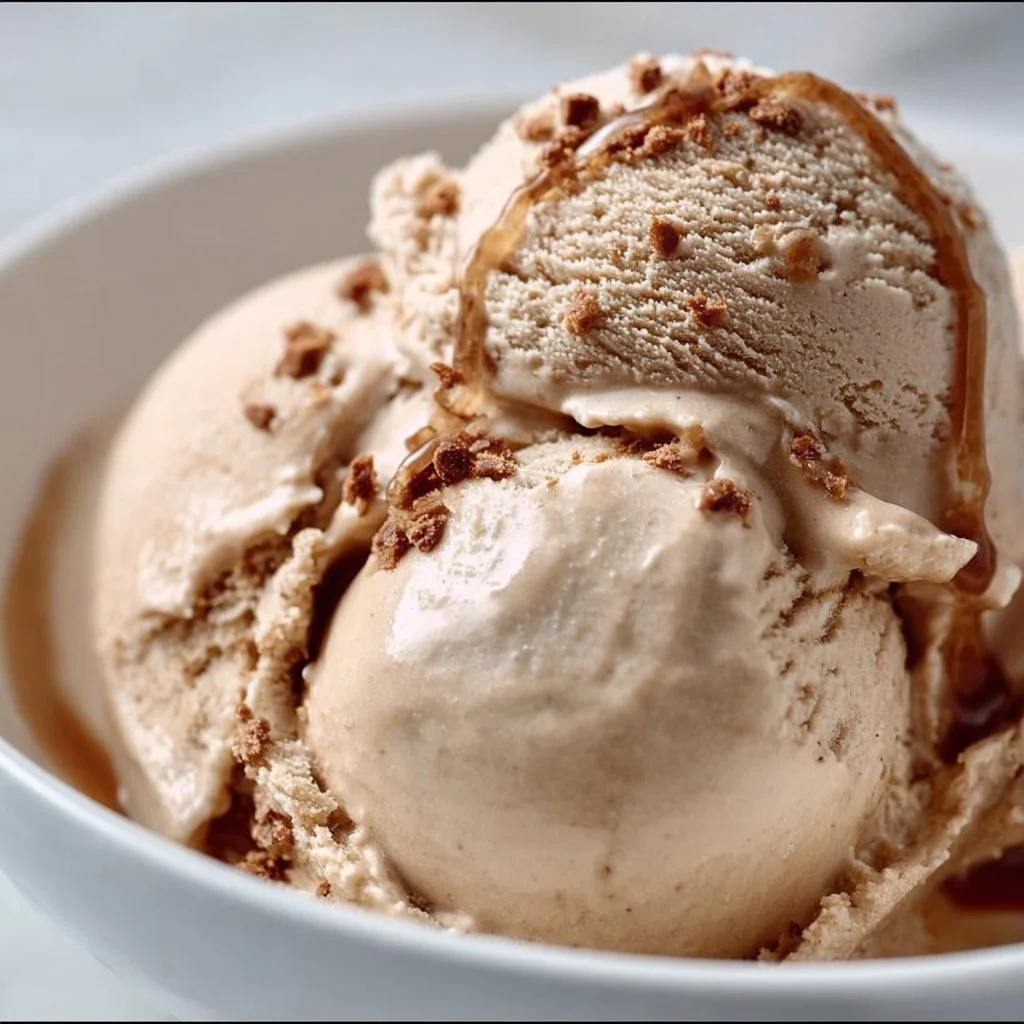
- When ready to serve, scoop the ice cream into bowls or cones. Get creative with toppings—chocolate shavings, extra coffee beans, or even a drizzle of caramel sauce for a decadent twist!
With just a few steps, you’ve transformed humble ingredients into a dreamy, creamy treat that will delight every coffee lover in your life. The best part? You made it yourself!
Serving Suggestions
When it comes to serving your coffee ice cream, think simple yet elegant. Scoop generous portions into scoop-shaped bowls or waffle cones. For an eye-catching presentation, sprinkle some crushed coffee beans or chocolate shavings on top. Feeling fancy? Serve alongside a warm slice of chocolate cake or drizzle some espresso over the top for a dessert that looks and tastes gourmet without breaking a sweat!
Recipe Variations
Now that you have the base recipe down, let’s explore some creative twists, shall we? Here are a few fun ideas to remix your coffee ice cream:
- Mocha Madness: Swirl in a ribbon of chocolate sauce for a decadent mocha flavor.
- Nutty Delight: Add a handful of finely chopped walnuts or hazelnuts for some extra texture.
- Spiced Coffee: Infuse your coffee with a pinch of cinnamon or nutmeg for a warm kick.
- Caramel Ripple: Drizzle salty caramel sauce into the mixture in the last few minutes of churning. Pure bliss!
- Dairy-Free Dream: Use coconut cream and almond milk to whip up a delightful dairy-free version.
Feel free to get creative here! This is your opportunity to play with flavors and find what resonates with your taste buds.
Chef’s Notes
As with every recipe, mine has a bit of a backstory! Initially, I stumbled upon this coffee ice cream recipe while exploring ways to use leftover coffee from my brewing adventures. It started off as an experiment but transformed into a family favorite over the years. Perfecting the balance between coffee and creaminess took a few tries (I might have eaten too many batches of ice cream in the process), but now, I can safely say it’s become a staple in my home.
Every time I make it, I’m reminded of those lazy Sundays with my family, and the joy of sharing this creamy goodness with friends makes it even sweeter. Cooking is all about connection and creating memories, isn’t it?
FAQs and Troubleshooting
1. Why does my ice cream feel too icy?
The key to creamy ice cream is incorporating enough air during churning and ensuring it’s properly chilled. If it’s still icy, try letting it soften a bit at room temperature before serving, or keep it in a more insulated container.
2. Can I use decaf coffee?
Absolutely! Decaf coffee works wonderfully if you prefer to keep your caffeine consumption in check. The flavor profile will remain delightful.
3. What if my ice cream is too hard to scoop?
This can happen if it’s been in the freezer for a while. Just let it sit out for about 10 minutes to soften before scooping—it’ll make serving much easier!
4. Can I make this without an ice cream maker?
Definitely! Pour your mixture into a freezer-safe dish, then stir it every 30-45 minutes until it reaches a creamy consistency. It might take a little longer, but the result is worth it!
Nutritional Info
(Optional: Consider adding nutritional information based on your ingredients and serving size. You can calculate this based on the specific products you use.)
And there you have it! A delightful journey into the world of homemade coffee ice cream. This recipe not only brings joy with every scoop, but it also invites playful creativity into your kitchen. So gather your friends (and family!), share laughs, and dig into your delicious creation. Remember, cooking is all about joy, so keep that spirit alive with every sprinkle and scoop! Happy ice cream making!
PrintHomemade Coffee Ice Cream

A rich and creamy homemade coffee ice cream that captures the essence of your favorite cup of coffee.
- Prep Time: 15 minutes
- Cook Time: 30 minutes
- Total Time: 45 minutes
- Yield: 4 servings 1x
- Category: Dessert
- Method: Churning
- Cuisine: American
- Diet: Vegetarian
Ingredients
- 2 cups heavy cream
- 1 cup whole milk
- 1 cup granulated sugar
- 1 tablespoon vanilla extract
- 1 cup strong brewed coffee
- 1/2 cup coffee beans (optional)
Instructions
- Brew your coffee and allow it to cool to room temperature.
- Combine the heavy cream, whole milk, and granulated sugar in a mixing bowl until the sugar is dissolved.
- Add the brewed coffee and vanilla extract, whisking until smooth.
- Chill the mixture in an airtight container for at least 1-2 hours.
- Churn the mixture in your ice cream maker for 20-25 minutes until it reaches soft-serve consistency.
- Freeze in a freezer-safe container for 4-6 hours or until firm.
- Serve in bowls or cones with desired toppings.
Notes
Try adding chocolate shavings or a drizzle of caramel for extra decadence.
Nutrition
- Serving Size: 1 serving
- Calories: 350
- Sugar: 25g
- Sodium: 50mg
- Fat: 24g
- Saturated Fat: 14g
- Unsaturated Fat: 8g
- Trans Fat: 0g
- Carbohydrates: 37g
- Fiber: 0g
- Protein: 3g
- Cholesterol: 80mg
Keywords: coffee ice cream, homemade ice cream, dessert recipes, creamy dessert