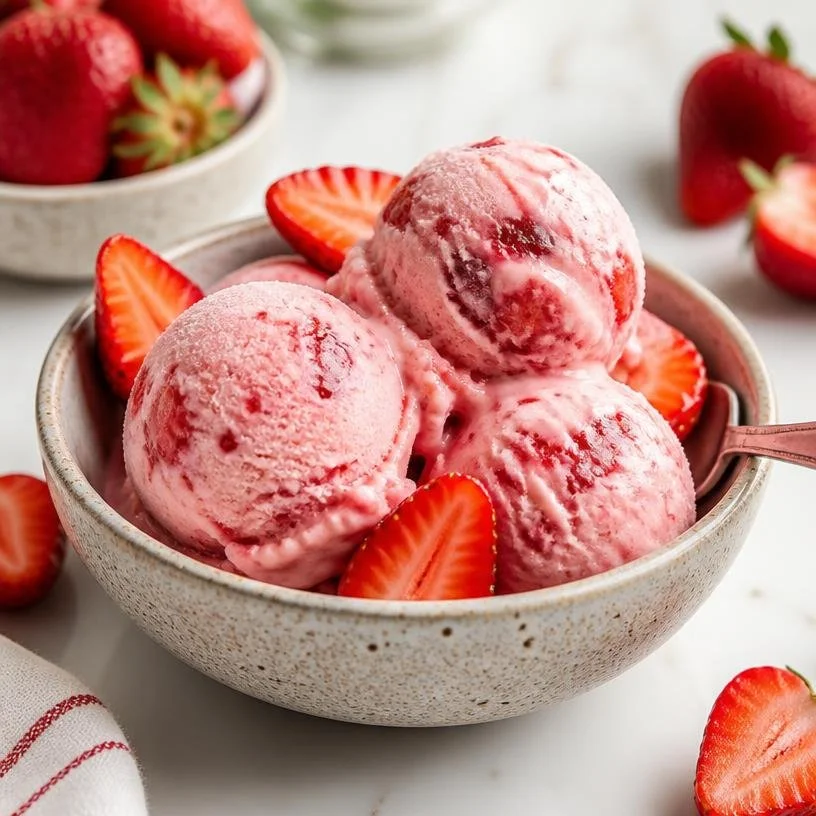
Indulge in the Joy of Homemade Strawberry Ice Cream
Hey there, fellow food lovers! Let’s take a moment to celebrate one of life’s little pleasures: the blissful experience of savoring a scoop of homemade strawberry ice cream. There’s just something magical about it, isn’t there? Maybe it’s the vibrant color, or the creamy texture that melts perfectly on your tongue. Whatever it is, making your own strawberry ice cream is an adventure that invites joy into the kitchen—and trust me, it’s not just for summer!
As we dive into this delightful recipe, imagine the sweet aroma of fresh strawberries filling your kitchen, the sound of your whisk mixing together a creamy base, and the sight of that gorgeous pink swirl churning away ready to become the ultimate treat. Here at Sprinkle Spoon, we believe that food is all about fun and creativity. So let’s roll up our sleeves and jump into this homemade strawberry ice cream journey together!
Now, this recipe is super simple, so even those who claim they can’t cook can whip this up with ease. All you need are a few fresh ingredients, an ice cream maker (if you don’t have one, no worries—I’ll share some tips!), and a sprinkle of enthusiasm!
Ready? Let’s bring a scoop of happiness into your bowl with this delicious homemade strawberry ice cream that will have your taste buds dancing. Grab your apron, and let’s get started!
A Nostalgic Scoop of Sweet Memories
I’ll let you in on a little secret: one of my most cherished childhood memories involving food revolves around my grandmother’s homemade strawberry ice cream. Every summer, my family would gather at her farm for the annual berry-picking extravaganza. We’d spend hours filling baskets with plump, juicy strawberries, laughing and racing each other to see who could pick the most. But the best part? The promise of her ice cream awaiting us back at the house.
I can still hear the whirring of the old ice cream maker as it churned, transforming those fresh berries into the most dreamy, creamy concoction. The anticipation was palpable, and the first scoop felt like summer itself! Each bite was not only a delicious treat but also a reminder of family, laughter, and the simple joy that comes from being together. Those moments still inspire me today, and they’re the heart and soul behind the recipes at Sprinkle Spoon.
Ingredients You’ll Need
Gathering the freshest ingredients is key for crafting the best homemade strawberry ice cream. Here’s what you’ll need:
-
1 1/2 cups strawberries, hulled and diced
Fresh strawberries are the star of the show! Use ripe, juicy berries for maximum flavor. If strawberries aren’t in season, feel free to use frozen ones—just remember to thaw them first. -
2 tablespoons honey
Honey adds a beautiful depth of sweetness without being overly sugary. If you prefer a vegan option, agave syrup or maple syrup can be fantastic substitutes! -
1/2 cup granulated sugar
Sugar is essential for that delightful sweetness and helps with the texture. If you’re looking to cut back a bit, you can reduce the sugar to 1/3 cup or use a sugar substitute. -
1 teaspoon lemon juice
A dash of lemon juice brightens the flavors and balances the sweetness. Fresh lemon juice is ideal, but bottled works in a pinch. -
1 cup heavy whipping cream
For that rich and luxurious creaminess! If you want a lighter version, you can opt for whole milk, though the texture may differ. -
1/2 cup half and half
This gives the ice cream a wonderful creaminess and mouthfeel; you can substitute it with more heavy cream or just milk if that’s what you have on hand. -
1 teaspoon vanilla extract
Always go for the pure vanilla extract—it adds a beautiful warmth to the flavor profile! I mean, who doesn’t love vanilla?
Step-by-Step Instructions
Now, let’s dive into the fun part: making the strawberry ice cream! Follow these simple steps:
-
Prepare the Strawberries
Start by washing the strawberries thoroughly. Remove the stems and hulls, then chop them into small pieces. If you want to enhance their flavor, toss them with a tablespoon of sugar and let them sit for about 10 minutes to create a lovely syrup.Chef hack: Mashing a few of the strawberries can also help release their juices; just make sure to keep some chunks for texture!
-
Combine the Base Ingredients
In a bowl, whisk together the honey, granulated sugar, and lemon juice until well combined. Add the heavy cream, half and half, and vanilla extract, mixing until everything is nicely blended. It’s such a satisfying moment when everything blends into a creamy mixture!Tip: Even a quick taste test here (using a clean spoon, of course!) will let you know if you want to adjust the sweetness or add a squeeze more lemon.
-
Blend in the Strawberries
Fold in the diced strawberries until they’re evenly distributed throughout the mixture. This is where the party begins—those pops of red will make your ice cream look so inviting! -
Chill the Mixture
Cover the bowl with plastic wrap or a lid and pop it in the refrigerator for at least an hour. Chilling helps the flavors meld together and lends to a creamier texture once churned. -
Churn Time!
Now comes the exciting part! Pour your chilled mixture into your ice cream maker, following the manufacturer’s instructions. You’ll be waiting about 20–30 minutes as it churns to perfection. You’ll want to check it frequently; it should be thickened and have a soft-serve consistency when ready.Chef tip: If you don’t have an ice cream maker, no worries! Pour your mixture into a shallow dish and freeze it. Every 30 minutes, take a fork and stir it vigorously to break up the ice crystals until the ice cream is fully frozen.
-
Freeze It to Firm Up
Once your ice cream reaches that delightful soft-serve texture, transfer it to an airtight container. Cover the surface with a layer of plastic wrap to prevent ice crystals from forming, then seal the container. Freeze for at least 4 hours or until firm. -
Scoop and Serve!
When you’re ready to serve, take the ice cream out of the freezer and let it sit at room temperature for a few minutes, making it easier to scoop. Then, dig in!Final touch: Don’t forget the sprinkles or a drizzle of chocolate sauce on top—life’s too short for plain ice cream!
Serving Suggestions
Serving homemade strawberry ice cream can be as simple or as extravagant as you like! Scoop it into cute bowls or cones, and top it off with fresh strawberries, a sprig of mint, or even some colorful sprinkles for that added touch of fun. If you’re feeling adventurous, drizzle some chocolate sauce or serve it alongside a warm slice of pie. Trust me, the combination of warm and cold is pure bliss!
Recipe Variations
Want to get creative? Here are some fun variations you could consider:
-
Strawberry Cheesecake Ice Cream: Add 1/2 cup of softened cream cheese to the base for a creamy, cheesecake twist!
-
Minty Strawberry Delight: Add a teaspoon of fresh mint extract for a refreshing minty flavor.
-
Chocolate Strawberry Swirl: Gently fold in some melted chocolate or cocoa powder for a rich chocolate-strawberry combo.
-
Nutty Crunch: Fold in some toasted nuts or granola just before the final freeze for an extra crunch.
-
Dairy-Free Option: Substitute the heavy cream and half-and-half with coconut cream and a plant-based milk, like almond or oat milk.
Chef’s Notes
This recipe has become a go-to for so many occasions in my life, from cozy family gatherings to spontaneous summer barbecues. Over time, I’ve played with flavors, adding spices or switching out berries, but the core love for those fresh strawberries remains unchanged. Just remember, there’s no one “perfect” ice cream—what matters is the fun you have creating it and the sweet moments you spend enjoying it with those you love.
Now, I can’t guarantee a mess-free kitchen (let’s be honest), but I can promise you a lot of laughter and joy along the way. And remember, if you accidentally spill some mix while pouring it into the ice cream maker, just treat it as an abstract art piece—it makes for a cool story!
FAQs and Troubleshooting
1. My ice cream is too hard! What should I do?
If your ice cream is too hard after freezing, let it sit at room temperature for 5–10 minutes before scooping. You can also stir in a bit of milk to the base before freezing to create a softer texture.
2. Can I use frozen strawberries?
Absolutely! Frozen strawberries work just fine. Just be sure to thaw them out first and mash them a bit to get the juices flowing.
3. What if I don’t have an ice cream maker?
No problem! Pour the mixture into a shallow container and place it in the freezer. Every 30 minutes, stir it vigorously with a fork for 3-4 hours until it’s frozen and creamy.
4. How long will this ice cream last in the freezer?
If stored properly in an airtight container, your homemade ice cream can last about 2-4 weeks. But honestly, it’ll probably be gone long before then!
Now that you’re well-equipped with a scrumptious recipe and insider tips, it’s time to hit the kitchen and start whipping up this homemade strawberry ice cream! Whether you’re creating it for yourself or sharing with friends and family, rest assured it will fill your heart—and your taste buds—with joy. Happy scooping!
PrintHomemade Strawberry Ice Cream
Indulge in the joy of making creamy homemade strawberry ice cream, a delightful treat for any occasion.
- Prep Time: 15 minutes
- Cook Time: 30 minutes
- Total Time: 45 minutes
- Yield: 4 servings 1x
- Category: Dessert
- Method: Churning
- Cuisine: American
- Diet: Vegetarian
Ingredients
- 1 1/2 cups strawberries, hulled and diced
- 2 tablespoons honey
- 1/2 cup granulated sugar
- 1 teaspoon lemon juice
- 1 cup heavy whipping cream
- 1/2 cup half and half
- 1 teaspoon vanilla extract
Instructions
- Prepare the strawberries by washing and chopping.
- Combine the honey, granulated sugar, and lemon juice in a bowl.
- Add the heavy cream, half and half, and vanilla extract, mixing well.
- Fold in the diced strawberries until evenly distributed.
- Chill the mixture in the refrigerator for at least an hour.
- Pour the chilled mixture into an ice cream maker and churn according to instructions.
- Transfer the ice cream to an airtight container and freeze for at least 4 hours.
- Scoop and serve the ice cream with your favorite toppings.
Notes
For a dairy-free option, substitute heavy cream and half-and-half with coconut cream and plant-based milk.
Nutrition
- Serving Size: 1 serving
- Calories: 250
- Sugar: 24g
- Sodium: 50mg
- Fat: 14g
- Saturated Fat: 8g
- Unsaturated Fat: 6g
- Trans Fat: 0g
- Carbohydrates: 30g
- Fiber: 1g
- Protein: 3g
- Cholesterol: 45mg
Keywords: ice cream, dessert, homemade, strawberries, summer treat